Protect Your Amazon EC2 Instances
Once you have registered your AWS account, you are ready to protect the Amazon EC2 instances in that account. Cohesity preserves the Instance Metadata Service v2 (IMDSv2) configuration of Amazon EC2 instances during protection.
If you have already registered your AWS account to protect Amazon RDS or Amazon S3 workloads, then you must Update the Existing CloudFormation Template to update the Cohesity permissions in your AWS account.
Cohesity's Options for Amazon EC2 Backup: AWS or Cohesity Snapshot
Cohesity Cloud Protection Service provides two options for Amazon EC2 backup:
-
AWS snapshot: Cohesity Cloud Protection Service protects the Amazon EC2 instances using the native AWS snapshots and stores them in the same AWS account and region as the source Amazon EC2 instances.
-
Cohesity snapshot:Cohesity Cloud Protection Service protects the Amazon EC2 instances by ingesting the backup data to an AWS region supported by the Cohesity Cloud Protection Service. The target AWS region is the region that is selected during AWS source registration. Cohesity snapshots provide an air-gapped backup and granular file & folder level recoveries. With air-gapped backup approach, the backed up data is isolated from any network connectivity, ensuring that your data remains safe. Network connectivity is resumed only during the recovery process, minimizing the risk of ransomware attacks.
When selecting a protection policy below, you can choose to back up your Amazon EC2 instances using either approach, or both.
Before you Begin
Before protecting your Amazon EC2 Instances, ensure you have met the prerequisites and understood the considerations.
Add Protection to Your Registered Amazon EC2 Instances
To protect your Amazon EC2 instances:
-
In Cloud Protection Service, navigate to Sources.
-
Find the registered AWS account and click into it.
-
Click the EC2 tab.
-
Use the checkboxes to select the Amazon EC2 instances for protection.
Optionally, you can configure auto-protect at the AWS account, region, or zone level. When this option is enabled at a particular level, all the Amazon EC2 instances that are added to that level in the future are automatically protected from the next protection run. Additionally, you can also perform tag-based auto-protection of Amazon EC2 instances.
-
To auto-protect the Amazon EC2 instances based on the hierarchy level, click the Hierarchy View icon located at the right corner of the page, and perform one of the following steps listed in the table below:
To auto-protect the Amazon EC2 instances.. Action At the account level
Select the checkbox of the AWS account, and then select Auto Protect This AWS.

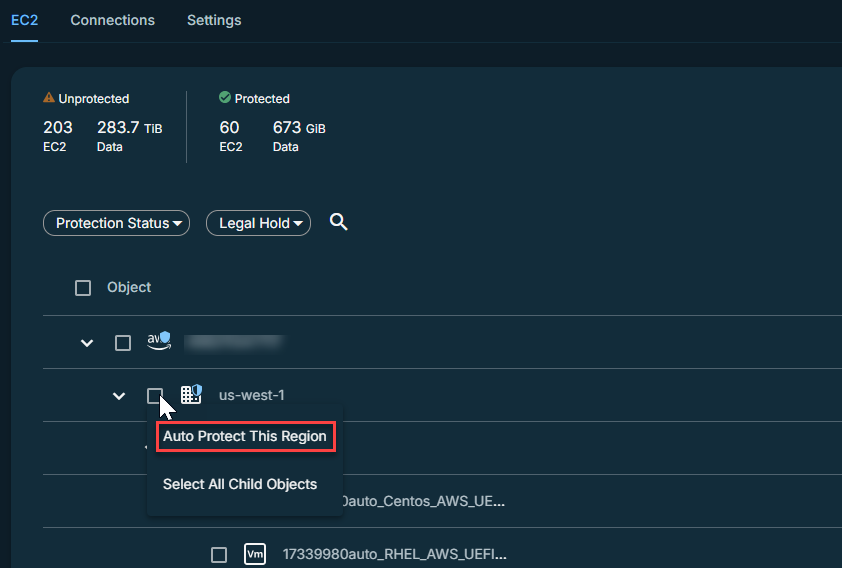
At the region level
Select the checkbox of the region, and then select Auto Protect This Region.
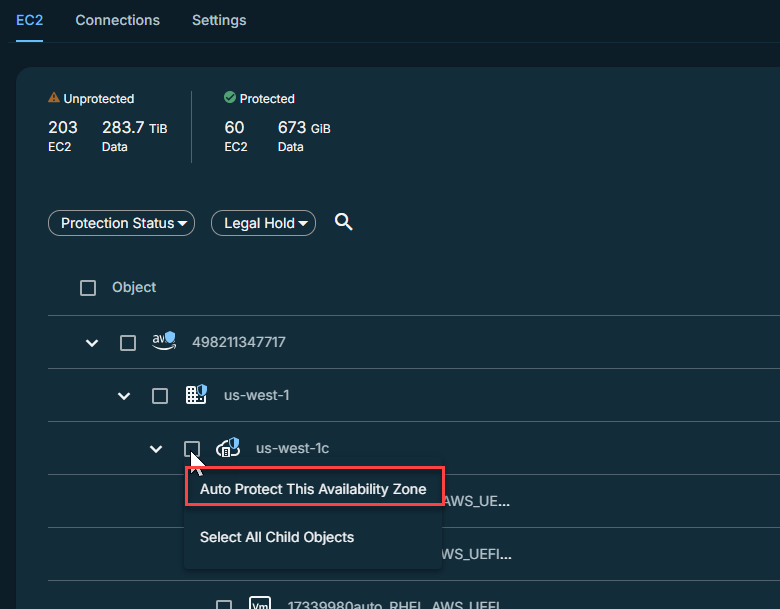
At the zone level
Select the checkbox of the availability zone, and then select Auto Protect This Availability Zone.
You can exclude individual Amazon EC2 instance from auto-protection by clicking the auto-protect icon (
 ) next to the instance. Amazon EC2 instances excluded from auto-protection are displayed with the exclude (
 ) icon.
 -
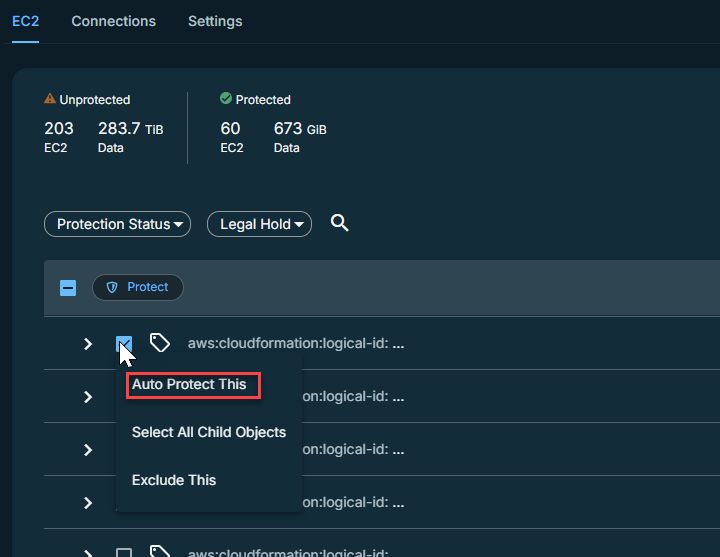
To auto-protect the Amazon EC2 instances based on tag, click the Tag icon at the right corner of the page. Select the checkbox of a tag and then select Auto Protect This to auto-protect the Amazon EC2 instance with this tag.
-
-
Click the Protect icon above the checkboxes.
-
To exclude any disks of the Amazon EC2 instance from protection:
-
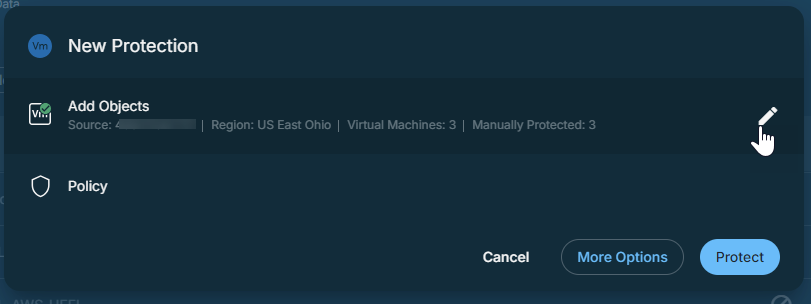
Click the edit icon displayed next to Add Objects.
-
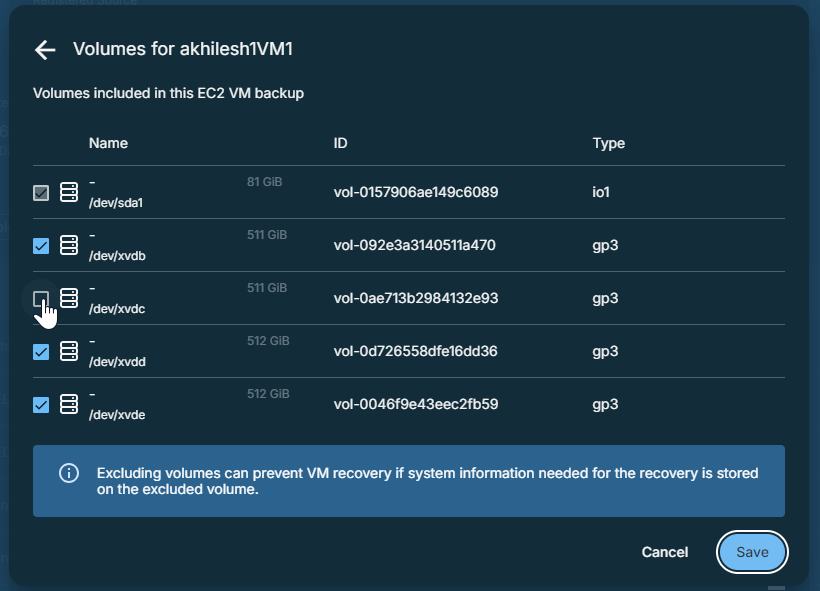
Click the All Volumes edit icon displayed next to the Amazon EC2 instance of which you want to exclude the disk.
-
Unselect the disks that you want to exclude from protection.
You cannot exclude the root disk from protection.
-
Click Save > Continue.
-
-
To exclude auto-protection of Amazon EC2 instances based on Tags:
-
Click the edit icon displayed next to Add Objects.
-
Click the Tags icon located at the right corner of the page.
The tags associated with the VMs are displayed.
-
Click the exclude icon next to the tag to exclude the auto-protection of VMs associated with that tag.
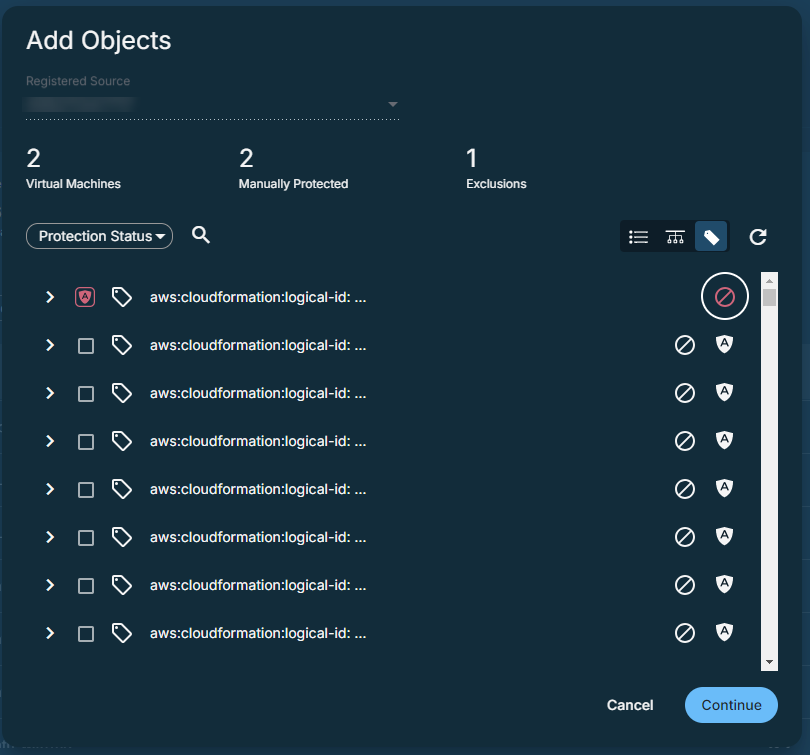
If an Amazon EC2 instance has multiple tags with Auto Protect and Exclude applied, exclusion takes precedence. These excluded Amazon EC2 instances are also excluded even if a parent object is auto protected.
-
Click Continue.
-
-
In the New Protection dialog, select a Policy from the following snapshot options:
-
Policy (AWS snapshot)
-
Policy (Cohesity snapshot)
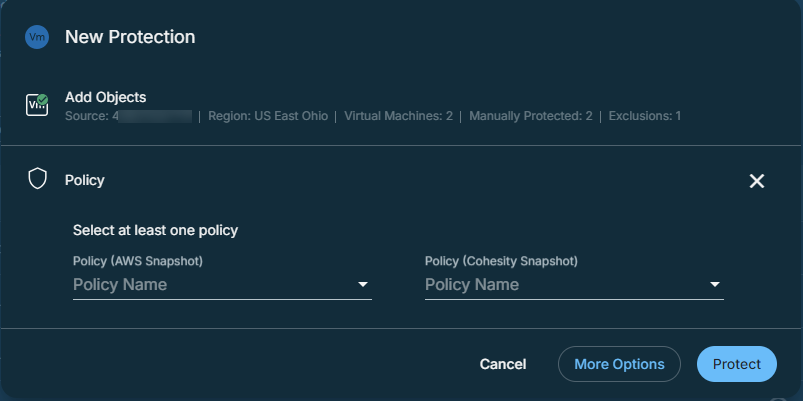
You can create AWS snapshots, Cohesity snapshots, or both. If you choose to create both snapshot types, you can use either the same policy or different policies to specify the backup frequency and retention.
If the existing policies do not meet your needs, you can create a new policy with the backup frequency and retention settings as desired.
If you have selected Policy (Cohesity snapshot), ensure that an AWS SaaS Connection is deployed for all the AWS regions where you have instances to protect. If a region in your AWS account does not have a SaaS Connection deployed, protecting the Amazon EC2 instances in that region will fail.
To view the SaaS Connections that are already configured, click the Actions menu (
) next to the registered AWS source and select Setup SaaS Connection.
-
-
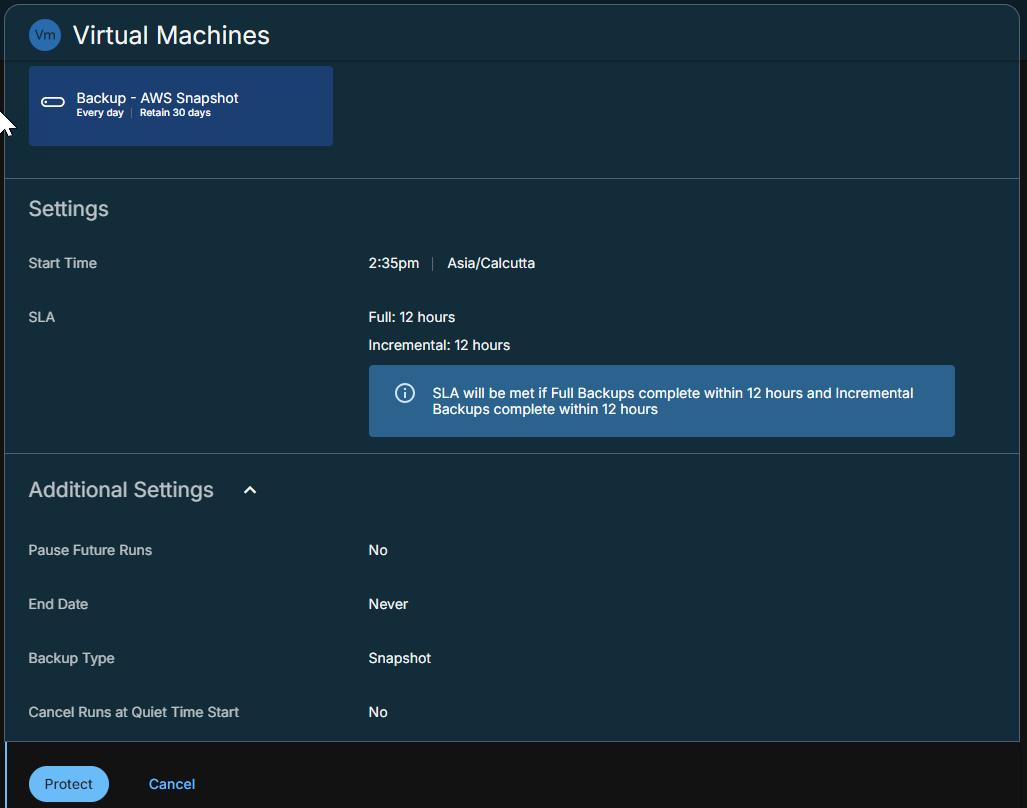
If you wish to change or configure any of the additional settings , select More Options and perform the below steps or else, click Protect.
-
Under Settings, edit the Start Time if necessary.
-
In the SLA field, define how long the administrator expects a protection run to take. Enter:
- Full. The number of minutes you expect a full protection run, which captures all the blocks in an object, to take.
-
Incremental. The number of minutes you expect an incremental protection run, which captures only the changed blocks in an object, to take.
-
If you need to change any of the additional settings, click the down arrow icon next to Additional Settings and click Edit.
-
Click Protect.
Cohesity Cloud Protection Service starts backing up the Amazon EC2 instances you selected. You can monitor the status of the backup in the Activity page.
Also, the Activity tab of a specific Amazon EC2 instance shows the history of all protection runs, including the one in progress.
If you have selected both AWS snapshot and Cohesity snapshot policies, then the Activity page will display two protection runs for the objects that are being backed up:
-
Backup. The protection run created for Cohesity snapshot-based protection.
-
Backup (AWS Snapshot). The protection run created for AWS snapshot-based protection.
To learn about managing the existing protection, see Manage Existing Protection.
Additional Settings
| Advance Settings | Description |
|---|---|
| End Date |
If you need to end protection on a specific date, enable this to select the date. |
| Backup Type |
Available only if you have selected AWS snapshot policy. Enable Create AMI and specify how often AMI should be created. For example, for the protection, you have configured an AWS snapshot policy with backup frequency set as daily. Now if you specify to create AMI for Every 5 runs, then in a month, AMI will created for 6 protection runs. |
| Quiet Times | Available only if the selected policy has at least one quiet time period. Toggle it ON to specify that all currently executing protection runs should abort if a quiet time period specified for the Protection Group starts. By default this toggle is OFF, which means after a protection run starts, it continues to execute even when a quiet time period specified for this protection run starts. However, a new protection run will not start during a quiet time period. |
Next > When the first protection run completes, you will be ready to recover your protected Amazon EC2 instances if and when you need to.
