Register Your AWS Account
To start protecting your AWS account, check the AWS account requirements and then register the AWS account as a data source in Cohesity Cloud Protection Service. (You can also unregister an AWS account if and when necessary.)
Register AWS Account
-
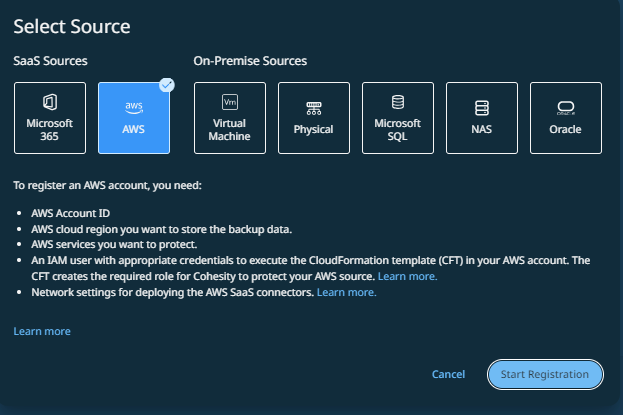
In Cloud Protection Service, navigate to Sources > + Register Source, and then select AWS.
-
Click Start Registration.
The Register AWS Source form appears.
-
Enter the AWS Account ID and select the Destination cloud region.
If you decide to create air-gapped Cohesity snapshots of your Amazon EC2 instances, this is the AWS region where the Cohesity Cloud Protection Service will store them.
-
Enable the option to Use this account as a backup source in DataProtect (enabled by default).
-
Select the AWS Services you want to register:
-
EC2
-
RDS
-
S3
-
DynamoDB
-
-
(Applies only for Amazon S3 service) Cohesity utilizes the Amazon S3 inventory report to protect the Amazon S3 bucket. Under Inventory Report Location, provide the following information to create the inventory report:
-
S3 buckets ARN: Enter the ARN of the Amazon S3 bucket where you want to create the inventory report. The ARN you provide must be of only those Amazon S3 buckets that are in the same AWS account and cloud region as the Amazon S3 you want to protect.
-
Prefix: Add a prefix value to the name of the inventory report that will be created.
-
The prefix can be of any character and can also include white spaces.
For example,
Report-Source Bucket. -
The prefix should not begin or end with a forward slash (/) .
-
The prefix should not contain consecutive forward slashes.
-
You must not upload any files in the prefix of the inventory report.
The inventory report will be created at
<Prefix>/<Path_to_inventoy_report>when you initiate the protection. Cohesity creates the path to the inventory report on AWS based on the cluster, Amazon S3 bucket, and protection.SaaS connection is not required for Amazon S3 bucket protection.
-
-
-
Click Next to generate a CloudFormation Template, which you will use to complete the AWS source registration.
-
Click Download CloudFormation Template.
-
Run CloudFormation Template in your AWS account to create the IAM roles and policies that the Cohesity Cloud Protection Service needs. On running the CFT, IAM roles and policies are created depending on the AWS services (Amazon EC2 instances, Amazon S3 buckets, and Amazon RDS databases) you selected for registration.
Optionally, you can restrict the granted permissions to a set of resources when creating the CloudFormation stack.
-
Once the roles and policies are created successfully, the Register AWS Source form will indicate the account authentication status.
-
Once account authentication is successful, click Register. (If authentication fails, contact Cohesity Support.)
If you plan to protect Amazon RDS and Amazon EC2 instances using Cohesity snapshots, make sure you deploy one or more SaaS Connectors in your AWS account by going to Sources and editing your AWS source. From there, you can enter the SaaS Connector configuration details.
Unregister AWS Account
If you plan to stop backing up your Amazon EC2 instances, Amazon S3, or Amazon RDS, you can unregister the AWS account from Cohesity Cloud Protection Service.
Before you unregister an AWS account from Cohesity Cloud Protection Service, you must unprotect all the protected objects in that AWS account.
To unregister the AWS account:
-
In Cloud Protection Service, navigate to Sources.
-
Click the Actions menu (
 ) next to the AWS account and select Unregister.
 -
In the Unregister Source dialog, click Unregister.
Edit AWS Account
You can edit the registered AWS account to add or remove the Amazon services protected by the Cohesity Cloud Protection Service from your AWS account.
To edit an AWS Account:
-
In Cloud Protection Service, navigate to Sources.
-
Click the Actions menu (
) next to the AWS account and select Edit. -
In the Edit AWS Source form, select or unselect the Amazon services (EC2, S3, and/or RDS) you need and click Update.
If you add or remove any Amazon services, then you must update the Run CloudFormation Template and execute it in your AWS account again to update the existing CloudFormation stack.
Next > You are now ready to protect the Amazon EC2 instances, RDS databases, or Amazon S3 in your AWS account!
