Create a DR Application
A DR Application allows you to specify the orchestration order (or the sequence) of the VMs with the ability to insert executable scripts and time delays. For more information, see DR Application.
Before you Begin
To activate DR plans, you need VMs that are being actively backed up by a Protection Group. Before adding the VMs to your DR Application:
-
Add the VMs to a Protection Group.
-
Initiate protection runs.
-
Ensure that the VMs are successfully backed up and replicated to DR cluster.
To create a DR Application:
-
In SiteContinuity, navigate to Infrastructure > Applications.
-
Click Create DR Application.
-
Enter a relevant Application Name.
-
From the Site drop-down, select a primary site.
-
From the Host drop-down, select the VMware vCenter from which you want to recover VMs.
-
Select Add VMs and then Select VMs.
The VM Selection dialog displays all the VMs in that vCenter. Click the
 icon to view the flat list of the VMs. Click the
  icon to view the hierarchy of the data centers, clusters, ESXi hosts, and folders in that vCenter.
 -
To add the VMs, select the checkboxes of the required VMs. You can add more VMs until you have all of the VMs you want in that VM Group.
Optionally, you can click the search icon and enter the VM name in the Search field. As you type, VMs that match your search term appear.
Select Protected by Cohesity from the Protection Status filter to select only the protected VMs.
You can only add VMs, not part of another DR Application.
-
The Validate Selected VMs page displays the VMs you have added, enabling you to evaluate the VM's protection status and RPO. An error icon (
 ) highlights the VMs that are not protected by the Protection Group or have RPOs that do not match the DR plan's RPO. You can do one of the following:
-
Click Back to navigate to the previous page and unselect the unprotected VMs.
-
Click Done to continue creating the DR Application. Add unprotected VMs to a Protection Group after the DR Application is created.
-
-
Click Done to create the VM Group.
The new VM Group is displayed on the Create DR Application page. To create more VM Groups, repeat steps 6 to 9.
-
(Optional) You can introduce a Delay component between any two VM Groups. To add a delay:
-
Click Add Delay.
-
Enter a number (minimum 1) and select seconds, minutes, or hours from the drop-down.
-
Drag the Delay component and drop it between the VM Groups.
-
-
(Optional) You can apply scripts to individual VMs.
-
Add Credentials. Enter the username and password for the VMs in the VM Group. You can add global credentials that are applicable to all the VMs in the group or add separate credentials for each VM. These credentials are needed to run the scripts on the VMs.
-
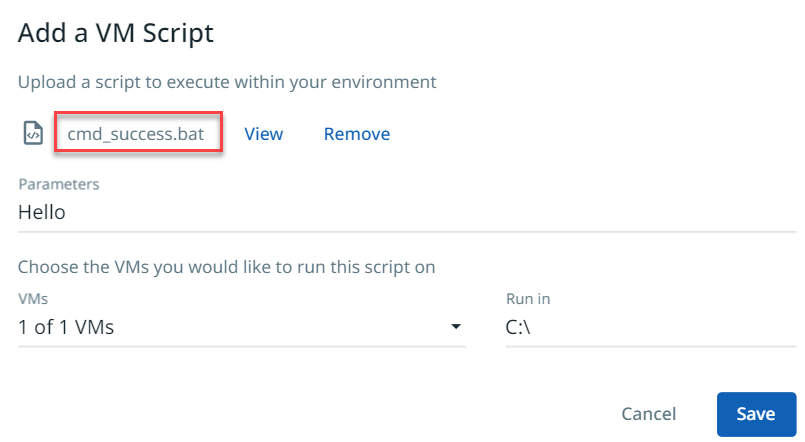
Select a VM script. This field is enabled only after you add credentials. Click Upload a Script to upload a custom script from your local system. You can add arguments to the script by entering the data in the Parameters text box. Select the VMs and folder you want the script to run on.
Cohesity supports Batch scripts for VMs running on Windows OS and Bash scripts for VMs running on Linux OS.
During the failover of Windows VMs that utilize domain accounts, script execution on the newly failed-over VM may fail if the VM cannot establish connectivity with the Active Directory (AD) domain controller. However, local users will still be able to execute the script. To prevent such issues, ensure that the AD settings on the target VM mirror those of the source VM.
-
-
Click Save:

The new DR Application appears on the Applications page. For details on how to manage DR Applications on the Applications page, see Manage DR Applications.
