Self-Managed KMS for Azure
To encrypt your data, you can use your own Azure Key vault keys.
Prerequisites
Before you use your own Azure Key vault keys for Cohesity Cloud Protection Service to encrypt the data in flight and at rest.
Ensure the following prerequisites:
-
Copy the details of your Azure Key Vault:
-
Directory ID
-
Vault URL
-
Key Identifier
For detailed instructions, see Copy the Required Details of your Azure Key Vault on the Azure Portal.
-
-
Register an app on Azure Portal for Cohesity to access your Azure Key Vault. For detailed instructions, see Register an App on the Azure Portal.
-
Configure the required access policy for the app to access your key vault. For detailed instructions, see Configure the Required Access Policy for the App to Access your Key Vault.
Copy the Required Details of your Azure Key Vault on the Azure Portal
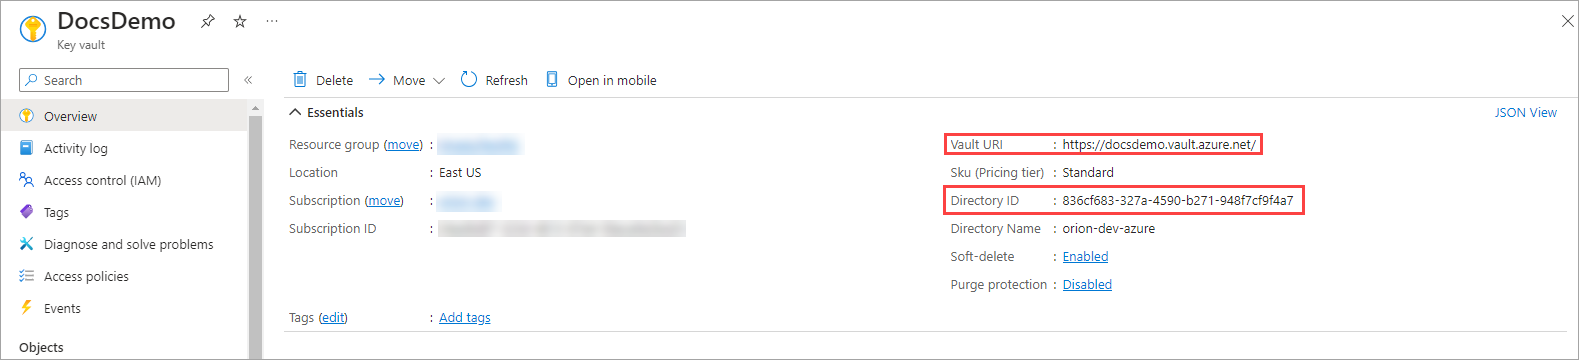
From the Azure Portal, copy the following details related to your Azure Key vault:
-
Directory ID
-
Vault URL
-
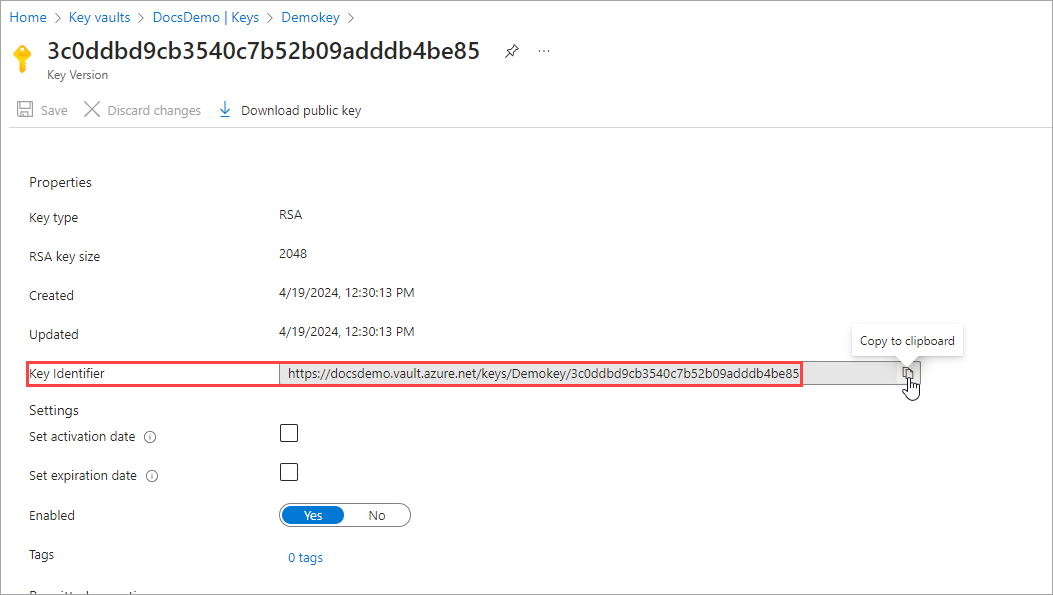
Key Identifier
To copy the details related to your Azure Key vault:
-
Log in to the Azure Portal with your Microsoft Azure administrator user credentials.
-
Under Azure Services, click Key Vaults.
-
In the Key Vaults page, select your Azure Key vault.
-
On the Azure Key vault page, perform the following:
-
Copy the Directory ID and the Vault URL.
-
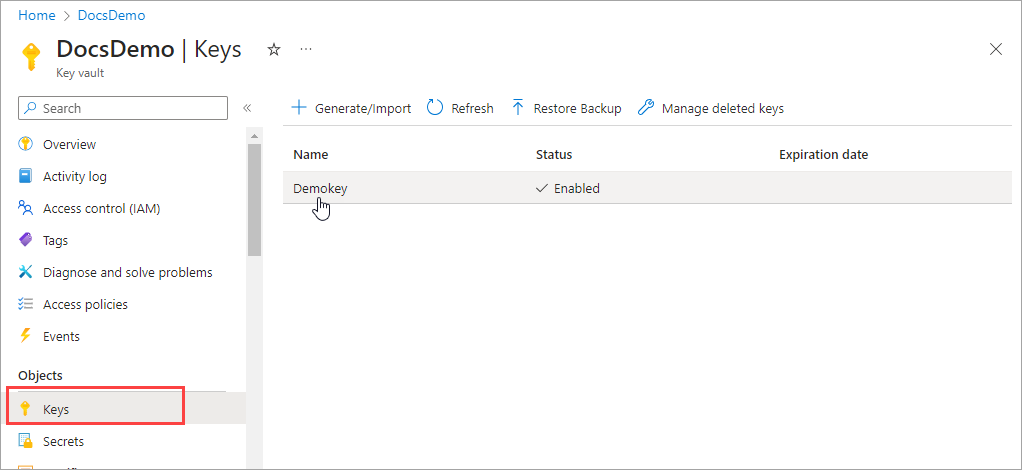
Under Objects, select Keys and click on your key.
-
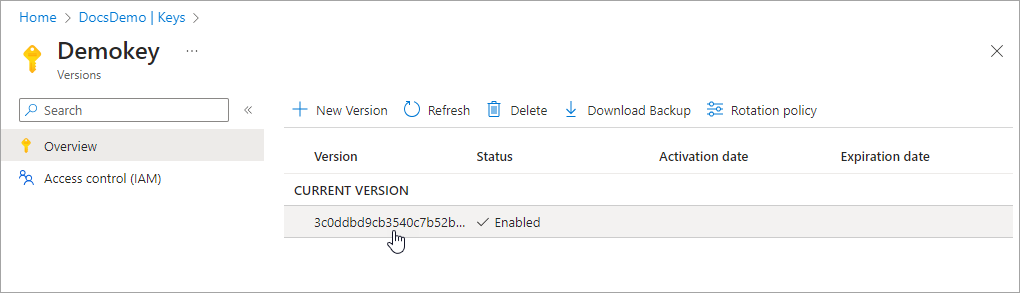
Click on the current version of the key.
-
Copy the Key Identifier.
-
Register an App on the Azure Portal
To register an app on Azure Portal:
-
Log in to the Azure Portal with your Microsoft 365 administrator user credentials.
-
Search for and select App registrations.
-
Click New registration.
-
Enter a Name for your app, select the Supported account types that can access the app, and click Register.
-
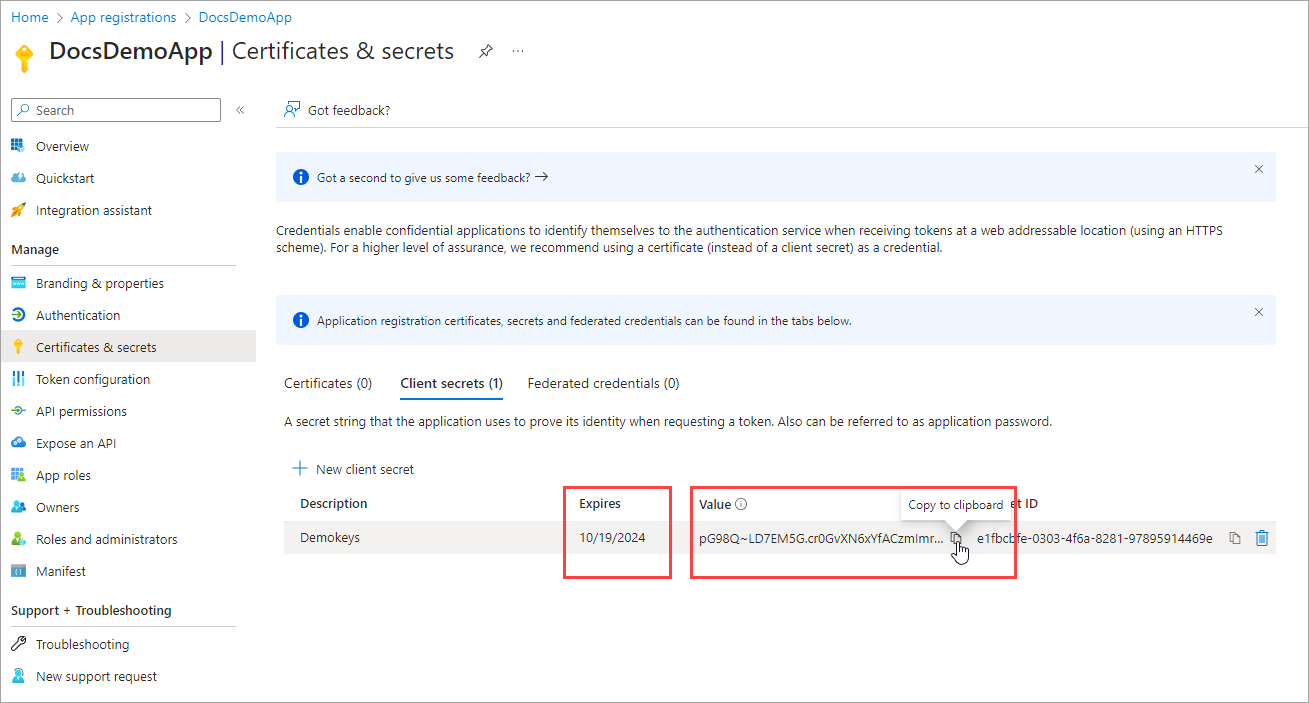
On the RegisteredApp page, click Overview and copy the Application (client) ID. You need to use this ID when you set up the Self Managed KMS for the Azure region on Cohesity Cloud Protection Service.
-
Next, you need to add a new client secret (or “App Secret Key”) that the app can use to prove its identity when requesting a token. Click Certificates & Secret > New client secret.
-
Enter a Description, select the recommended number of days under Expires, and click Add.
-
Under Client secrets, click the Copy button next to the string under Value. Also, note down the Expiry date.
Configure the Required Access Policy for the App to Access your Key Vault
The app must have proper authentication and authorization to access a key vault. Access to your key vault can be provided using an Azure RBAC or Key Vault access policy.
Microsoft recommends using Azure RBAC instead of Key Vault access policy.
If you choose to use Azure RBAC, ensure that you create a custom role and add the following entries under “permissions” in the JSON file of the custom role. Then, assign the custom role to the app.
 "permissions": [
            {
                "actions": [
                    "Microsoft.KeyVault/vaults/keys/read"
                ],
                "notActions": [],
                "dataActions": [
                    "Microsoft.KeyVault/vaults/keys/read",
                    "Microsoft.KeyVault/vaults/keys/encrypt/action",
                    "Microsoft.KeyVault/vaults/keys/decrypt/action"
                ],
                "notDataActions": []
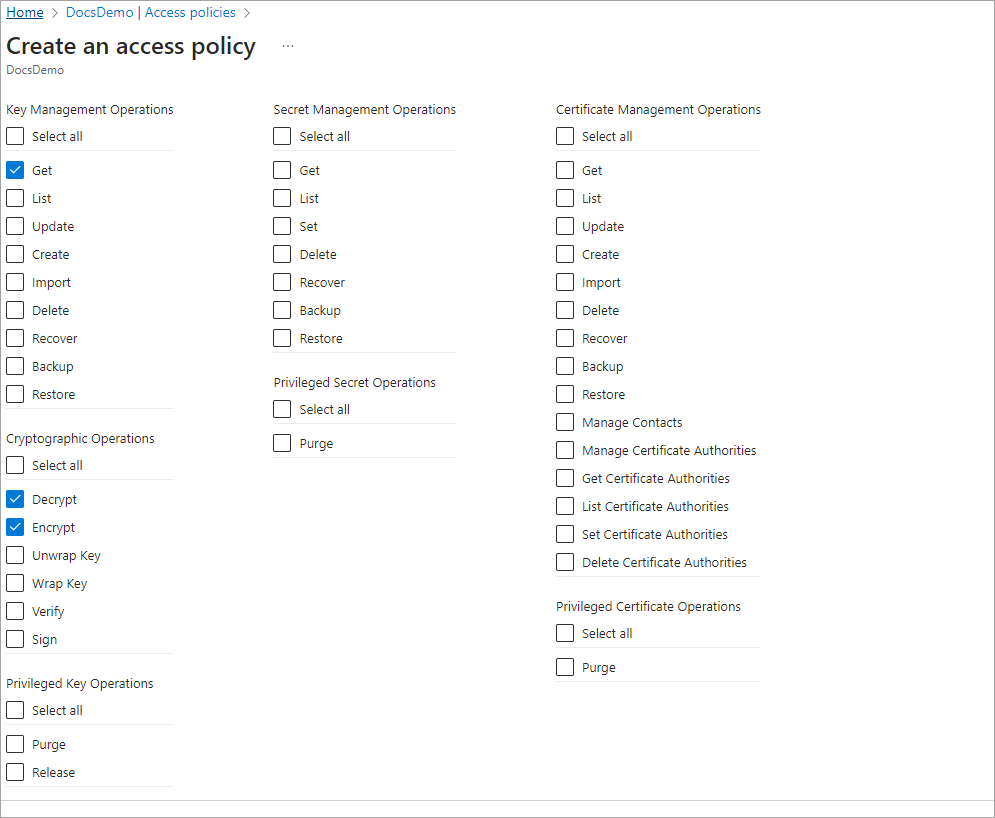
If you choose to use the Key Vault access policy, then ensure that you create a custom access policy with the following permissions and assign it to the app:
| Type | Permissions |
|---|---|
| Key Management Operations | Get |
| Cryptographic Operations |
|
Sample:
Configure Self-Managed KMS for Azure
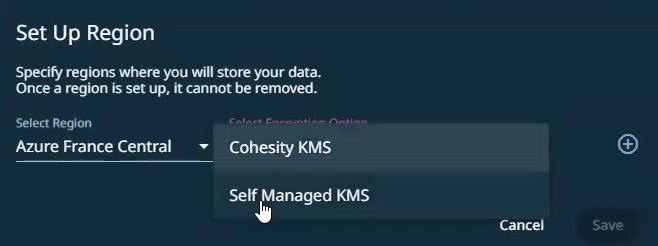
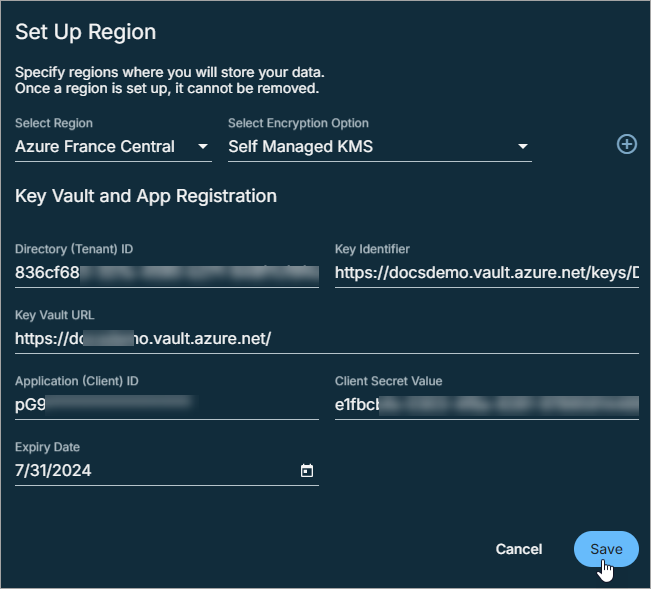
To use your own Azure Key Vault keys, on the Set Up Region dialog, perform the following:
-
Choose the Region and select the Self Managed KMS as the Encryption Option.
-
Under the Key Vault and App Registration sections, enter the following details:
-
The Directory (Tenant) ID, Key Identifier, and Key Vault URL that you have copied from your Azure Key Vault on Azure Portal.
-
The Application (Client) ID, Client Secret Value, and the expiry date of the Client Secret that you have noted down while registering the app on Azure Portal.
-
-
Click Save.
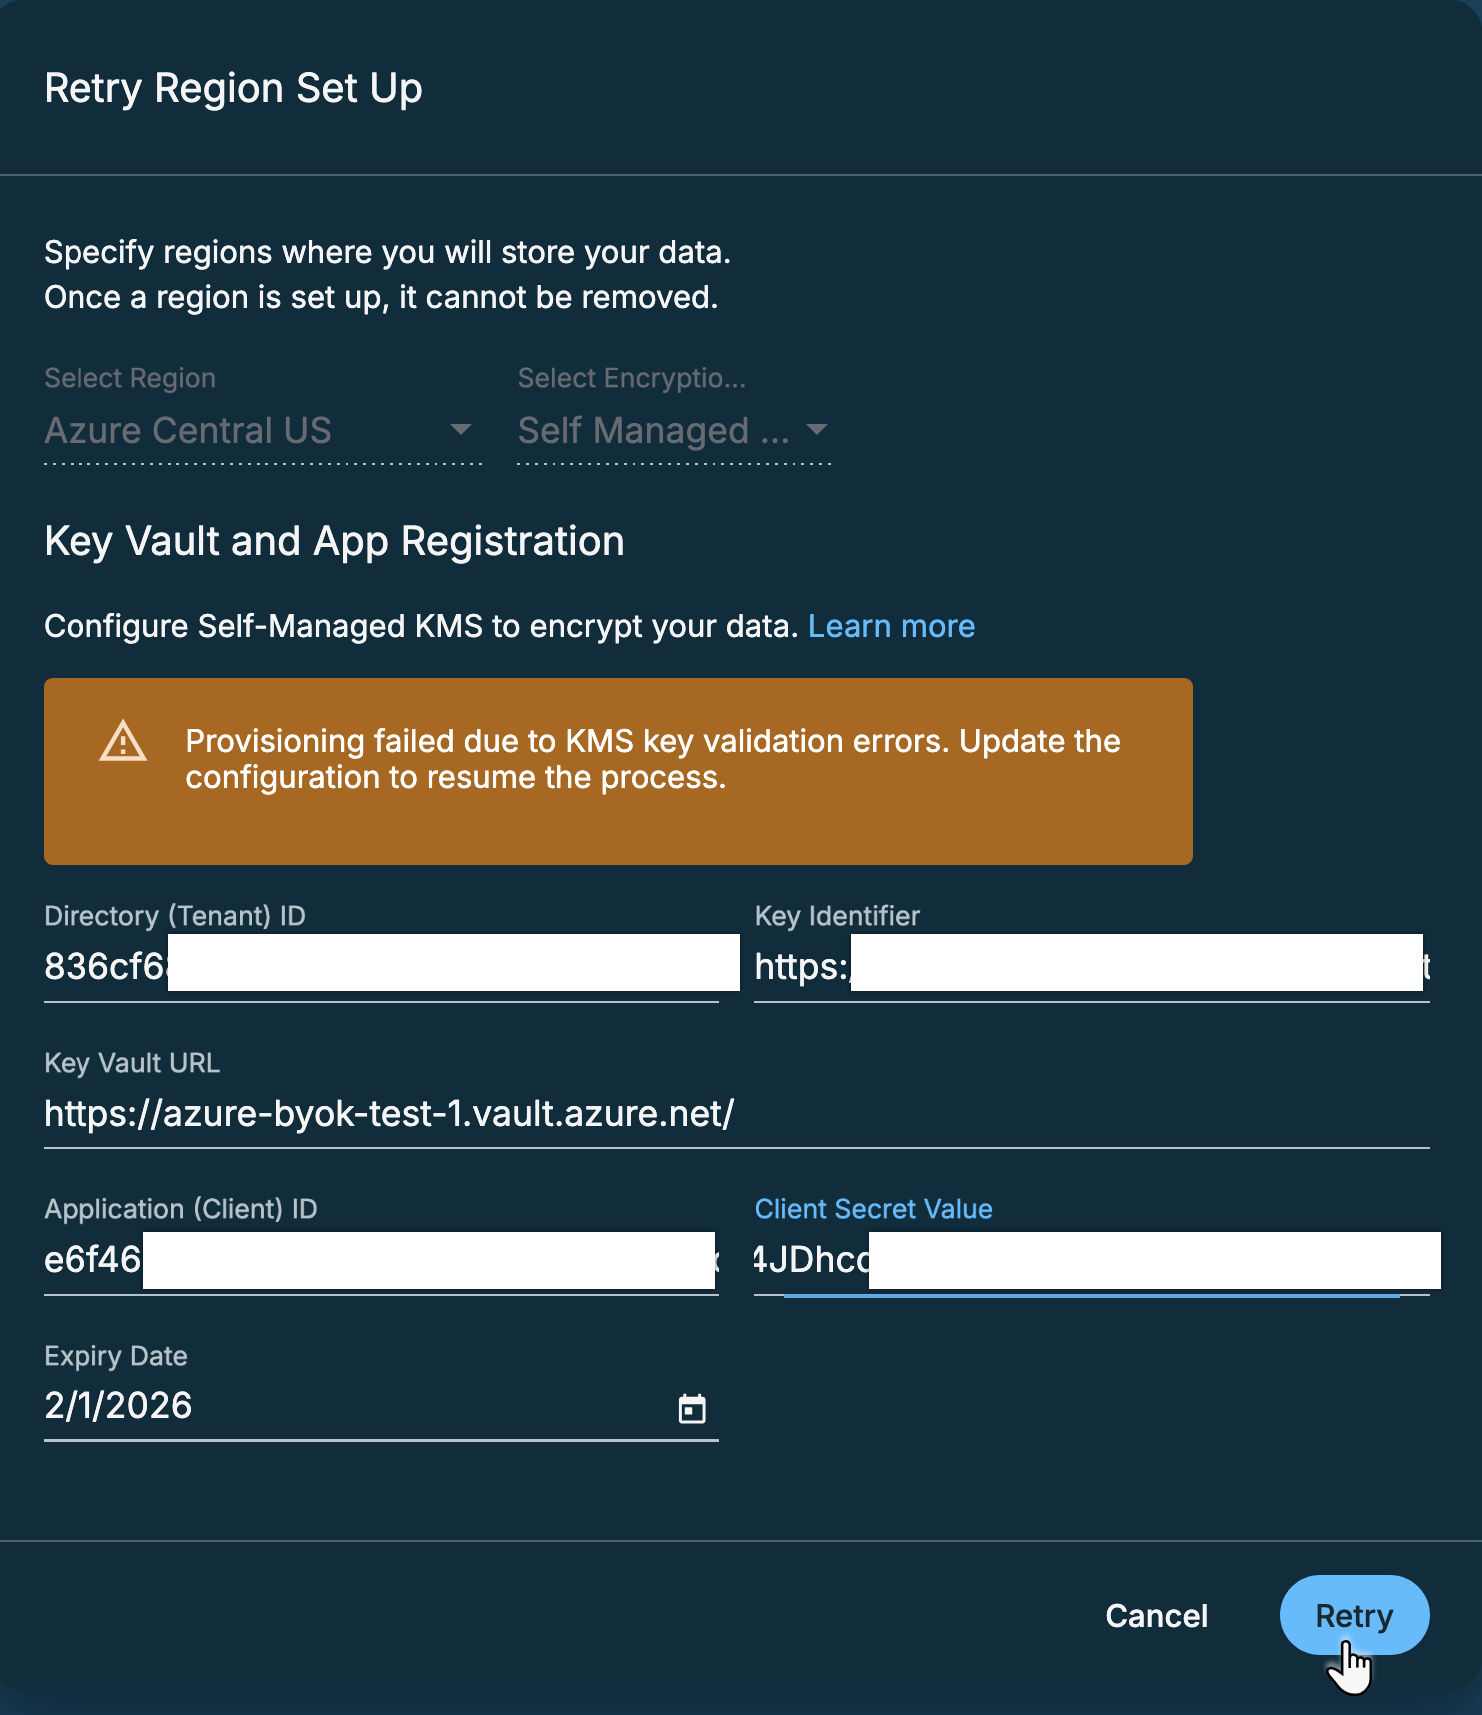
Retry Self-Managed KMS Provisioning for Azure
If the Azure KMS key validation fails due to incorrect or invalid input during the region setup, you can re-enter the correct configuration details and resume the provisioning process without restarting the entire process.
This is a Private Preview feature. Contact your Cohesity account team to enable the feature.
To retry Azure KMS key validation:
-
Click the Actions menu (
 ) next to the Status column and select Review and Retry.
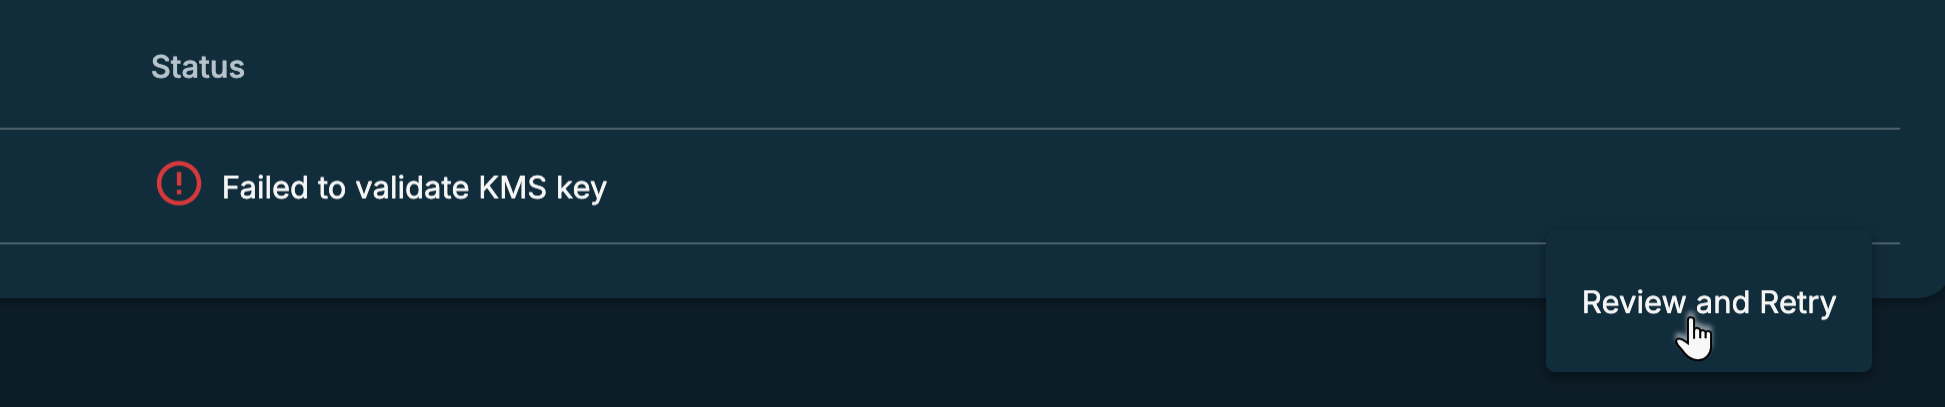
-
On the Retry Region Set Up pop-up screen, verify and update the Key Vault and App Registration details.
-
Click Retry to complete the Azure KMS key validation.
Next > Add users to access the Cohesity Cloud Protection Service.
