Protect Entra ID
Once you register Azure with Entra ID as a data source in Cloud Protection Service, you are ready to protect Entra ID in the Azure source.
-
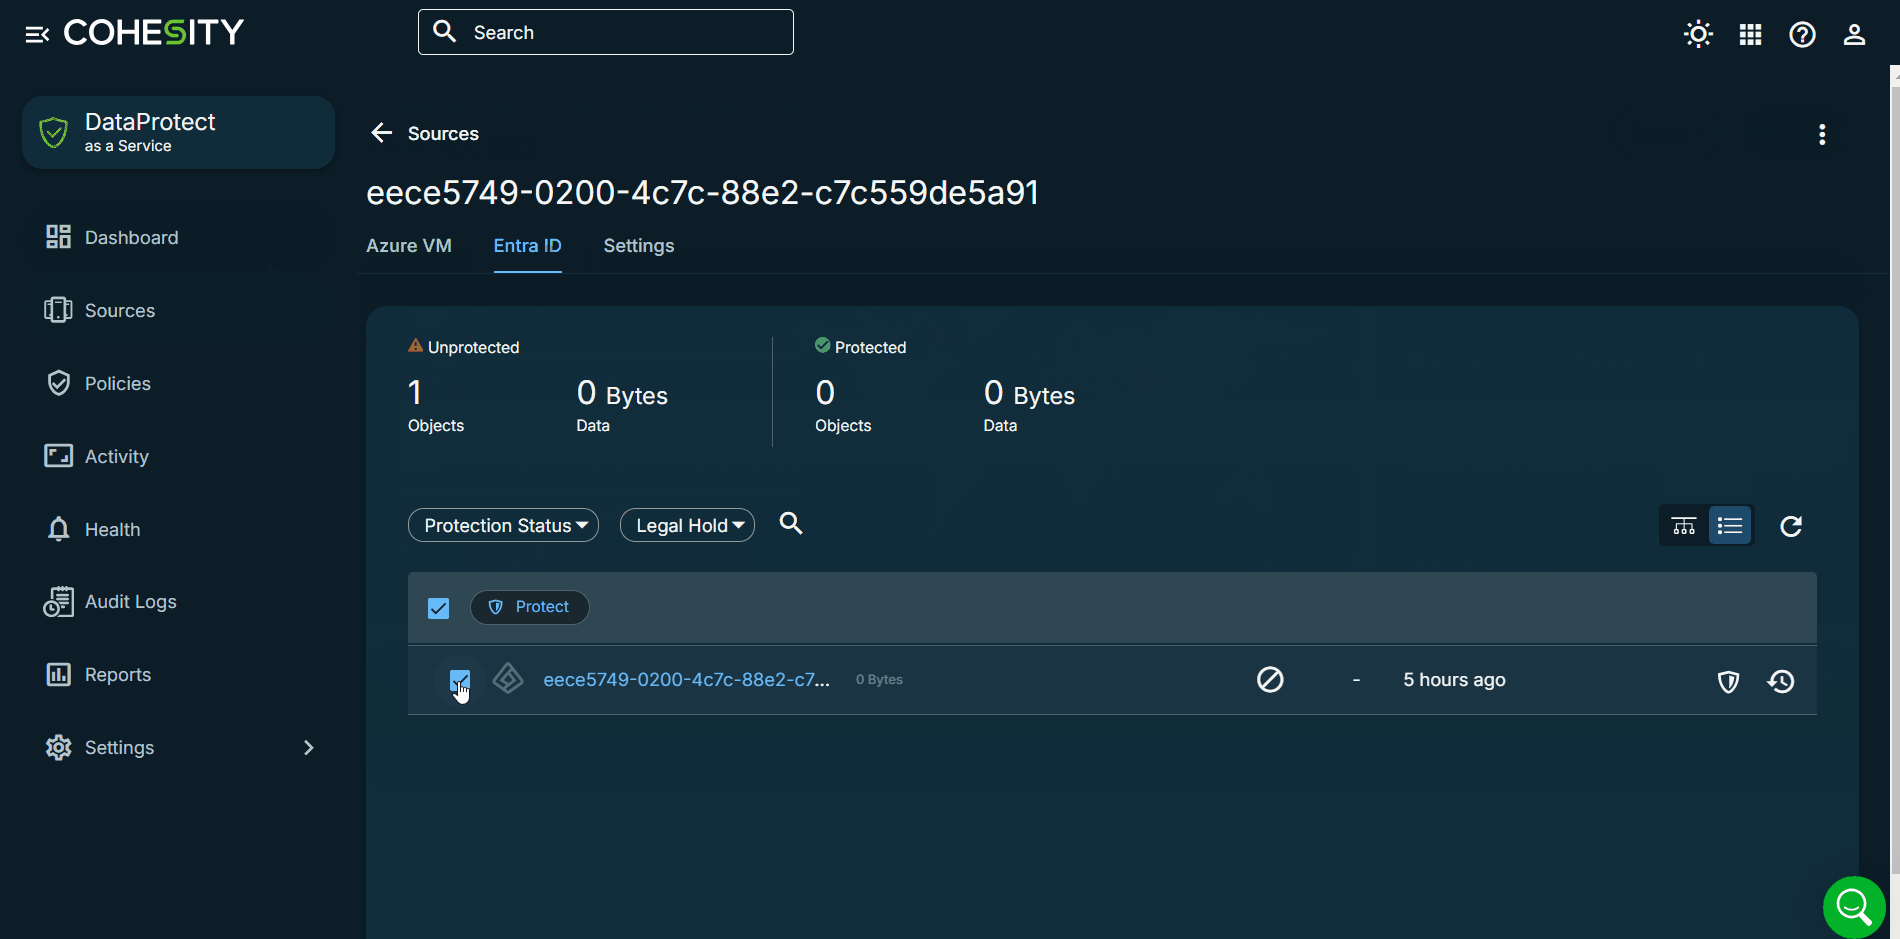
In Cloud Protection Service, navigate to Sources, find the registered Azure source, and click on it.
-
Click the Entra ID tab.
-
Use the checkboxes to select the objects for protection.
-
Click Protect.

-
Choose a policy to specify backup frequency and retention. If you do not have a policy, you can easily create one.
-
To change or configure any of the additional settings, select More Options and perform the below steps, or else, click Protect.
-
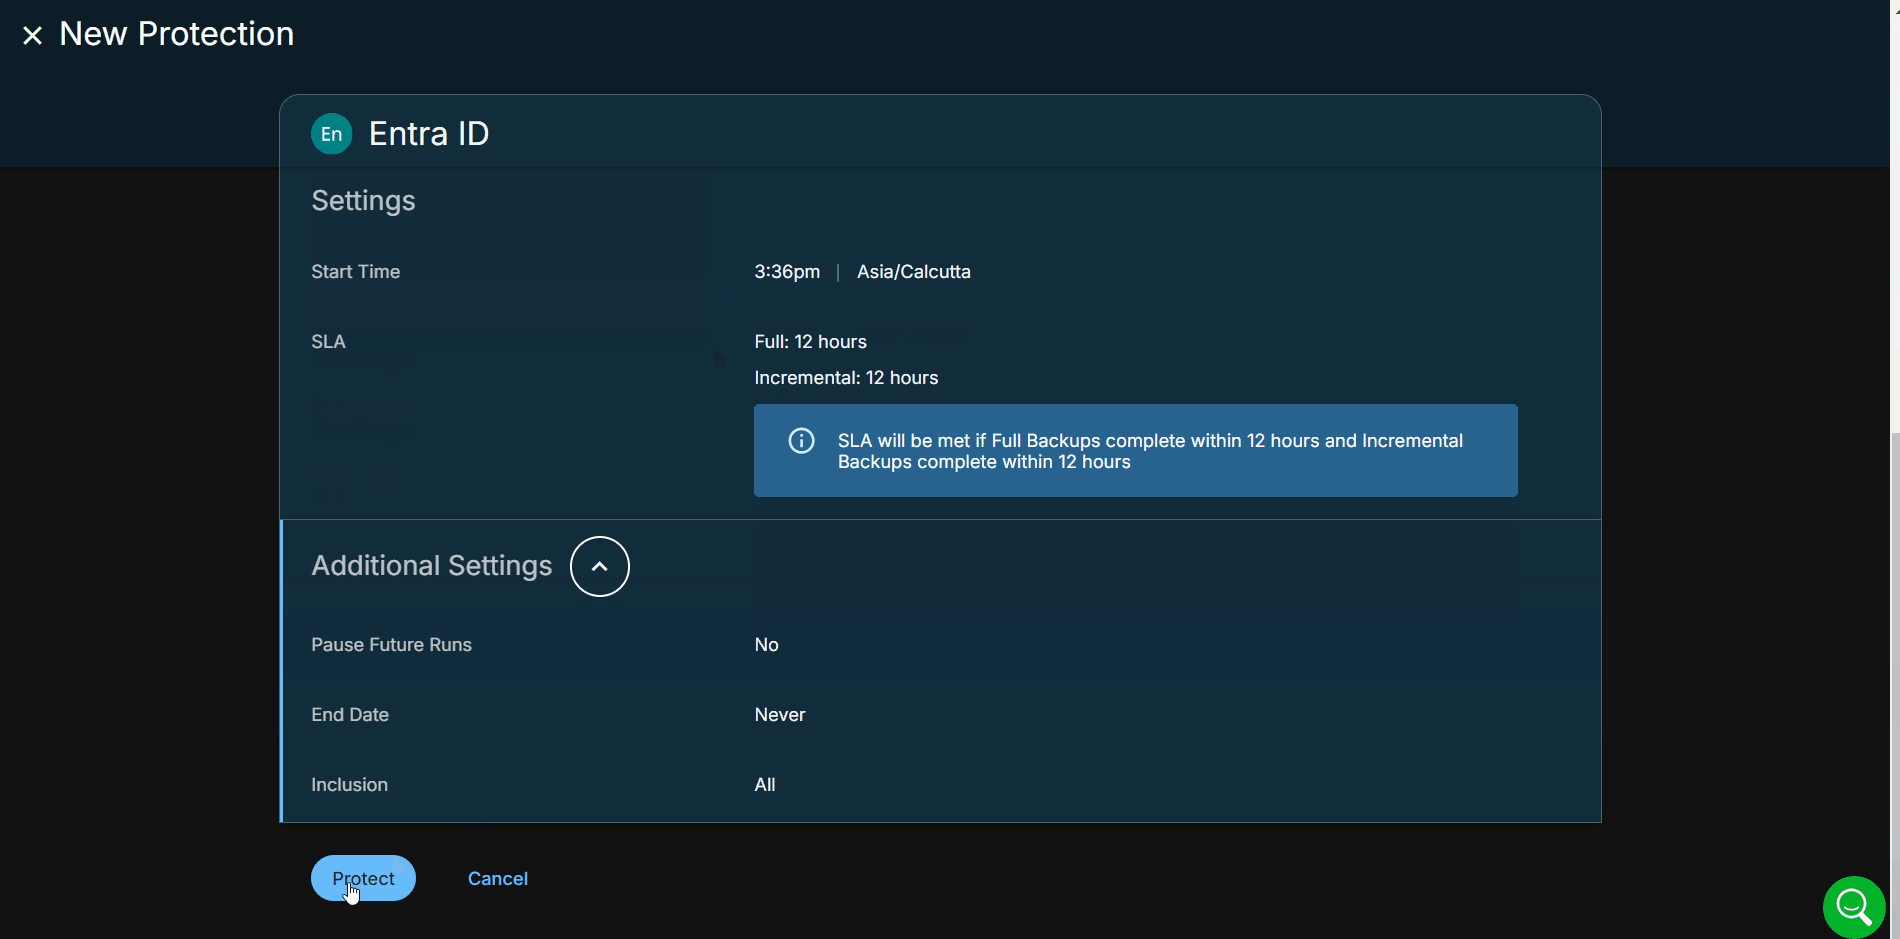
Under Settings, edit the Start Time if necessary.
-
In the SLA field, define how long the administrator expects a protection run to take. Enter:
-
Full. The number of minutes you expect a full protection run, which captures all the blocks in an object, to take.
-
Incremental. The number of minutes you expect an incremental protection run, which captures only the changed blocks in an object, to take.
-
-
If you need to change any of the additional settings, click the down arrow icon next to Additional Settings and click Edit.

-
Click Protect.
You can monitor the status of the backup on the Activity page. Also, the Activity tab of a specific Entra ID shows the history of all protection runs, including the one in progress.
Cloud Protection Service starts backing up the Entra ID you selected.
Additional Settings
| Settings | Description |
|---|---|
| Pause Future Runs | Toggle on this option to stop protection runs from executing. Once you enable this option, no protection runs will be scheduled. |
| End Date | If you need to end protection on a specific date, enable this option to select the date. |
| Inclusion |
By default, all objects are included for protection. The options include:
|
Next > When the first protection run completes, you will be ready to recover your protected data when and if you need to.
