Protect Azure Virtual Machines
Before you protect the Azure VMs in your Azure source, you must set up a SaaS Connection for each region under each Azure subscription in your Azure source. A SaaS Connection consists of one or more SaaS Connectors, which are VMs that act as data movers between your data sources and the
Once you set up a SaaS Connection, you are ready to protect the Azure VMs in the Azure source.
To protect your Azure virtual machines:
-
In Cloud Protection Service, navigate to Sources, find the registered Azure source and click into it.
-
Click the Azure VM tab.
-
Use the checkboxes to select the objects (VMs) for protection.
Optionally, you can configure auto-protect at the Azure tenant, subscription, or resource group levels. When this option is enabled at a particular level, all the VMs that are added to that level in the future are automatically protected from the next protection run. Additionally, you can also perform tag-based auto-protection of Azure VMs.
-
To auto-protect the VMs based on the hierarchy level, click the Hierarchy View icon located at the right corner of the page, and perform one of the following steps listed in the table below:
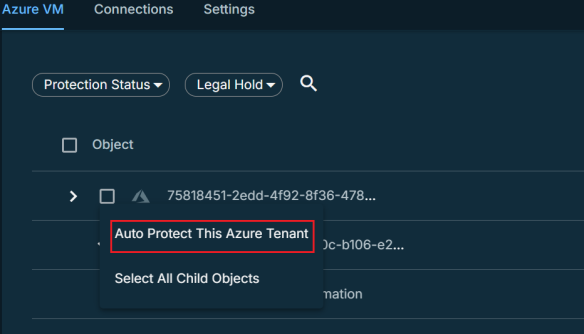
To auto-protect the Azure VMs.. Action At the tenant level
Select the checkbox of the Azure source, and then select Auto Protect This Azure Tenant.
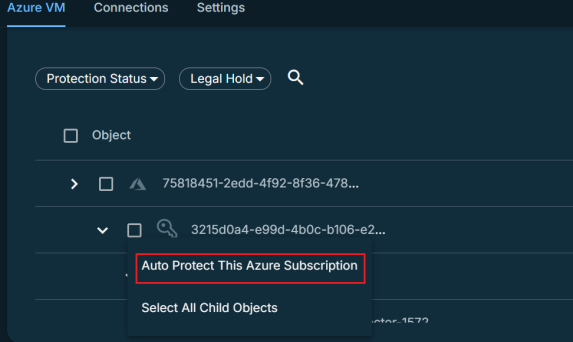
At the subscription level
Select the checkbox of the subscription, and then select Auto Protect This Subscription.
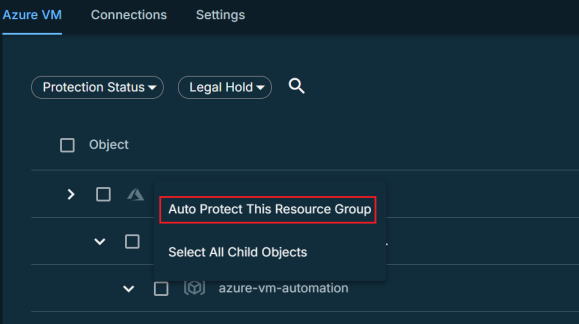
At the resource group level
Select the checkbox of the resource group, and then select Auto Protect This Resource Group.
-
To auto-protect the VMs based on tag, click the Tag icon at the right corner of the page. Select the checkbox of a tag and then select Auto Protect this Tag to auto-protect the VMs with this tag.
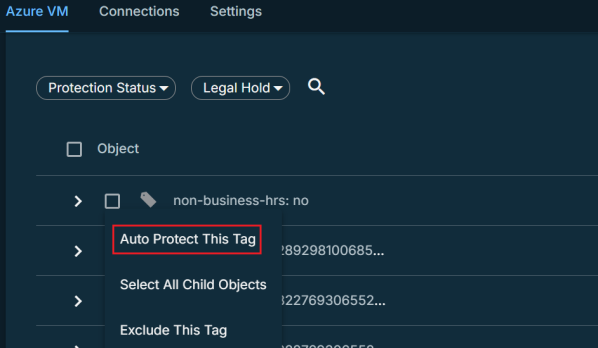
You can exclude individual VMs from auto-protection by clicking the auto-protect icon (
 ) next to the VM. VMs excluded from auto-protection are displayed with the exclude (
 ) icon.
 -
-
Click the Protect icon above the checkboxes.
-
To exclude any disks of the VM from protection:
-
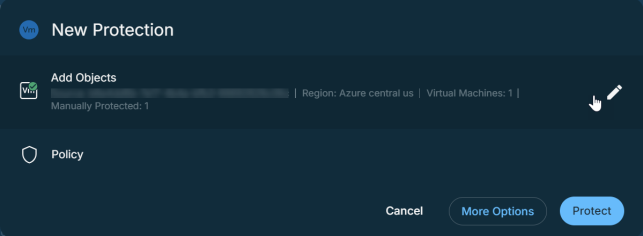
Click the edit icon displayed next to Add Objects.
-
Click the All Volumes edit icon displayed next to the VM of which you want to exclude the disk.
-
Unselect the disks that you want to exclude from protection.
You cannot exclude the root disk from protection.
-
Click Save > Continue.
You cannot exclude disk at the object level for auto-protected VMs. To exclude disk for auto-protect VMs, use the Volume Exclusion Settings option in the Additional Settings.
-
-
To exclude auto-protection of VMs based on Tags:
-
Click the edit icon displayed next to Add Objects.
-
Click the Tags icon located at the right corner of the page.
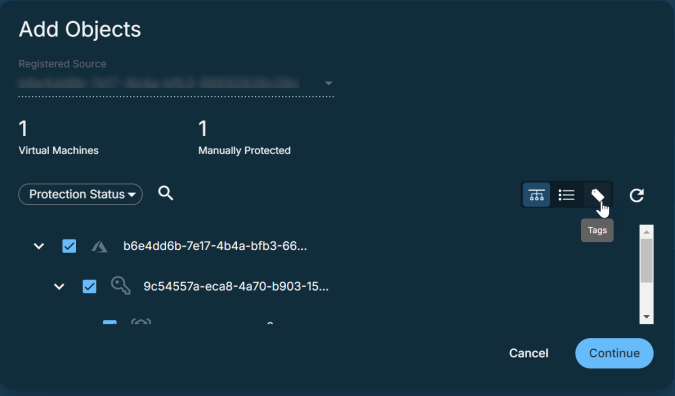
The tags associated with the VMs are displayed.
-
Click the exclude icon next to the tag to exclude the auto-protection of VMs associated with that tag.
-
Click Continue.
-
-
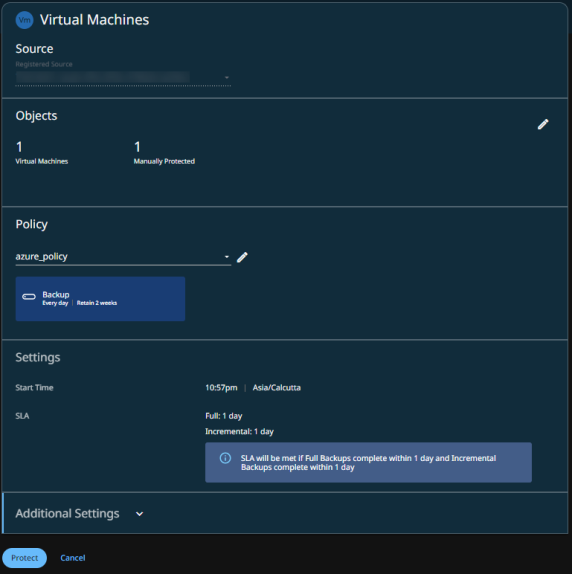
Choose a policy to specify backup frequency and retention. If you don't have a policy, you can easily create one.
-
To change or configure any of the additional settings, select More Options and perform the below steps, or else, click Protect.
-
Under Settings, edit the Start Time if necessary.
-
In the SLA field, define how long the administrator expects a protection run to take. Enter:
-
Full. The number of minutes you expect a full protection run, which captures all the blocks in an object, to take.
-
Incremental. The number of minutes you expect an incremental protection run, which captures only the changed blocks in an object, to take.
-
-
If you need to change any of the additional settings, click the down arrow icon next to Additional Settings and click Edit.
-
Click Protect.
Also, the Activity tab of a specific Azure VM shows the history of all protection runs, including the one in progress.
Additional Settings
| Advance Settings | Description |
|---|---|
| Pause Future Runs |
Toggle on this option to stop protection runs from executing. Once you enable this option, no protection runs will be scheduled. |
| End Date |
If you need to end protection on a specific date, enable this to select the date. |
| Azure SAS URL Type |
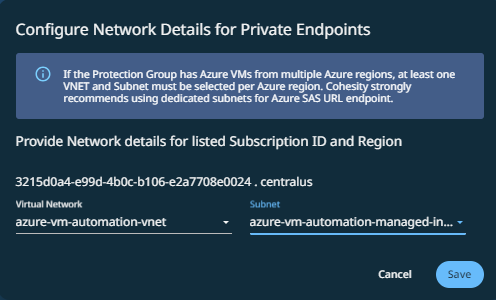
For the backup of Azure VMs, Cohesity uses the snapshots of Azure managed disks that are accessible through SAS URLs. Select one of the following endpoint options to access data from the SAS URL:
|
| Volume Exclusion Settings |
Use the following parameters to form a boolean expression for excluding disks:
For example, the expression, ( Exclusion of disks enabled at the object level will take precedence over the exclusion configured here. |
| Quiet Times |
(Available only if the selected policy has at least one Quiet Time.) When enabled, all the protection runs that are currently executing will cancel when the Quiet Time period starts. By default, this setting is disabled, meaning that after a protection run starts, it continues to execute even when a Quiet Time period starts. However, new protection runs will not start during a Quiet Time. |
