Alerts
The Cohesity Cloud Protection Service creates an alert for various reasons:
- It finds a potential problem
- Certain criteria exceed the defined threshold
- Informational events which occur in the system
- To indicate the success or failure of the protection run.
Each alert has a severity rating that indicates the seriousness of the problem:
- Critical—Immediate action is required because it detects a severe problem that might be imminent or major functionality is not working, such as a missing VM backup.
- Warning—Action is required, but the affected functionality is still working, such as the restore task failed due to some external target connectivity and/or credentials issues.
- Informational—Immediate action is not required, and the alert provides an informational message.
For a listing of the Alerts created by the Cohesity Cloud Protection Service, see Alerts References.
Analyze the Alert
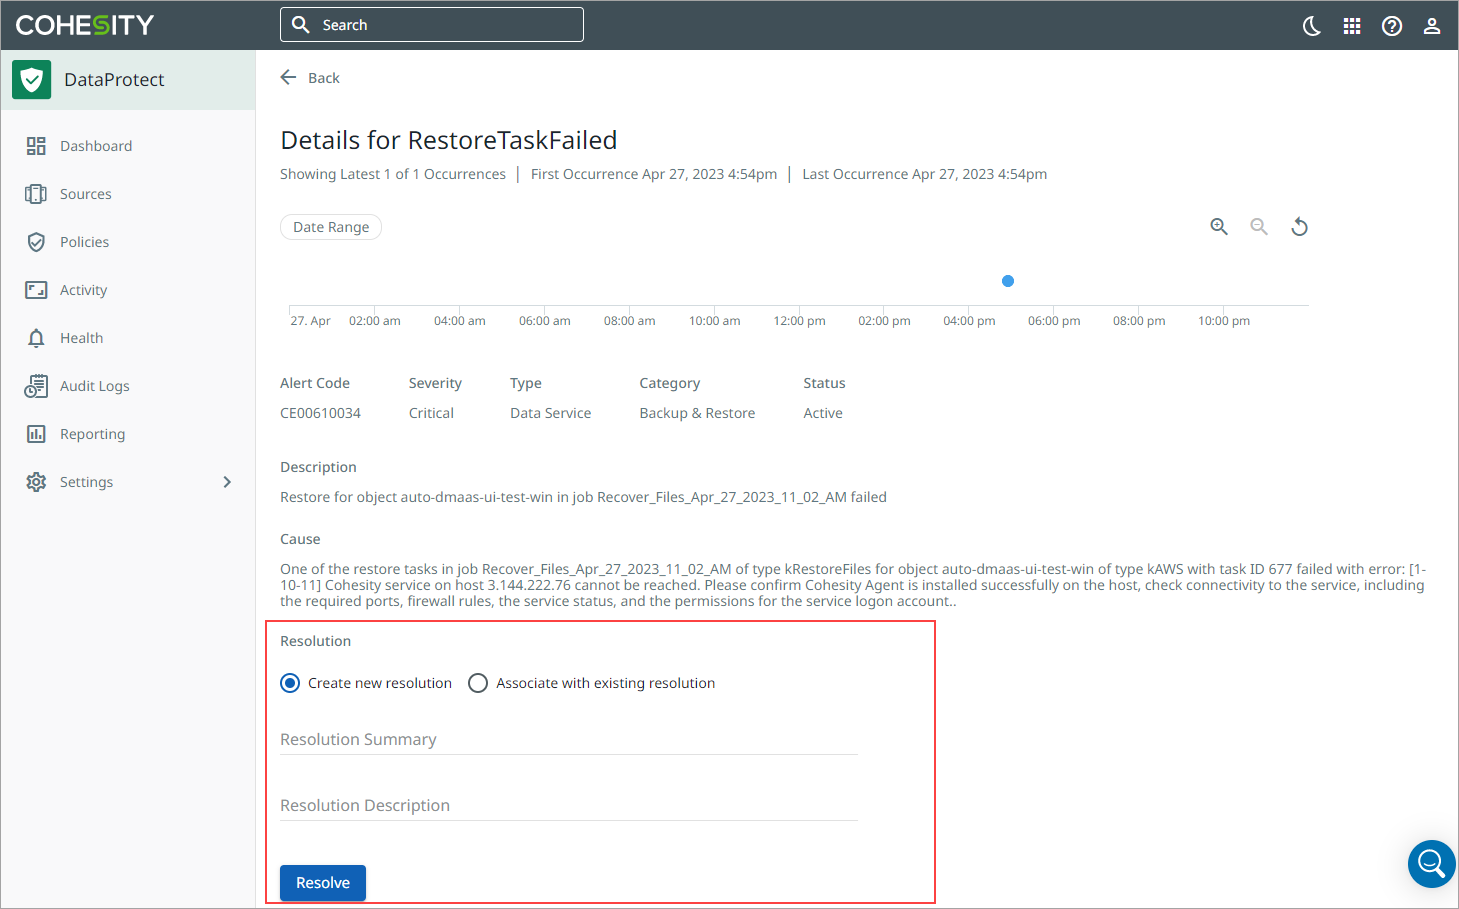
You can click on an alert from the Alerts tab and view the alert details on the Details for <Alert_Name> page.
The Details for <Alert_Name> page includes a timeline view showing the date and time the alert was triggered. The page also provides the following details of the alert:
| Details | Description |
|---|---|
| Alert Code | The alert code. You can click on the alert code for detailed information about the alert. |
| Severity | The severity rating of the alert. |
| Type | The alert type. It defines the Cohesity component that triggered the alert. |
| Category | The alert category. |
| Status | The status of the alert. It can be Active, Resolved, or Note. |
| Description | A brief description of the problem that triggered the alert. |
| Cause | A brief description of the cause of the problem. |
Alert Notification
You can configure general alert email notifications or enable Webhooks for alerts notification in the Health > Notification tab. For more information, see Configure Alert Notification Settings.
Once you have reviewed the alert, you can resolve the alert using the page's Resolution section. You can create a new alert resolution or attach an existing one in the Resolution section.
Resolve Alerts
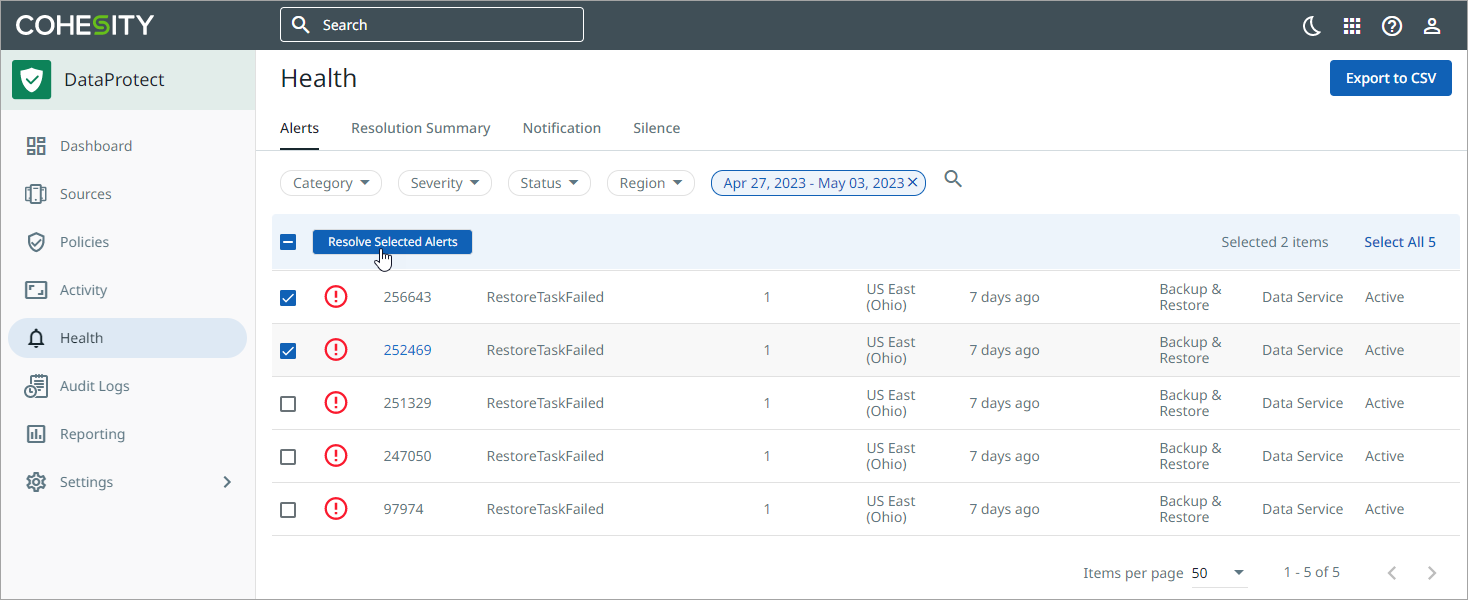
In case if you are aware of the problem and confirm that the issue has been resolved or if the issue does not require further attention, from the Alerts tab, you can manually resolve those alert(s). You can either create a new resolution of the alert(s) or attach an existing resolution to the alert(s).
Create a New Resolution
To create a new resolution:
-
In the Alerts tab, select an alert or multiple alerts that you plan to resolve and click Resolve Selected Alerts.

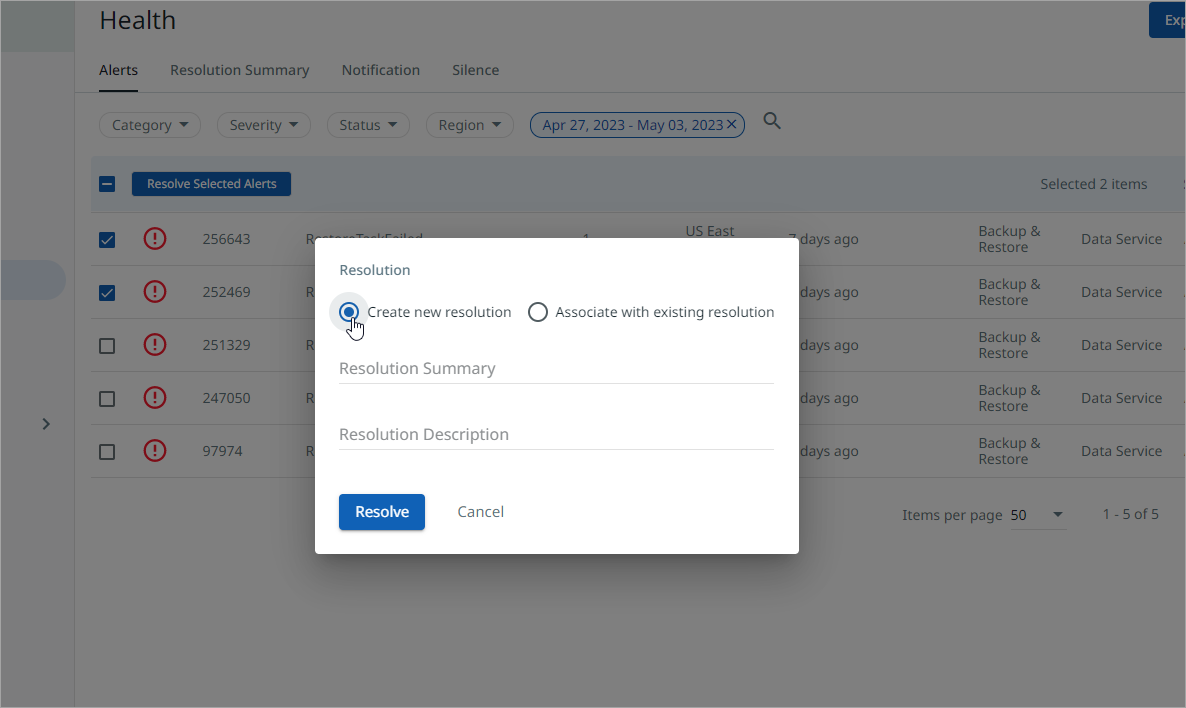
- In the Resolution dialog, do the following:
Select Create new resolution.

- In the Resolution Summary field, add a resolution summary for the alert.
- In the Resolution Description field, add a brief description of the resolution.
- Click Resolve.
The resolution is added to the selected alerts, and the alert(s) status is marked as Resolved.
Attach an Existing Resolution
To attach an existing resolution to the alert(s):
-
In the Alerts tab, select an alert or multiple alerts that you plan to resolve and click Resolve Selected Alerts.

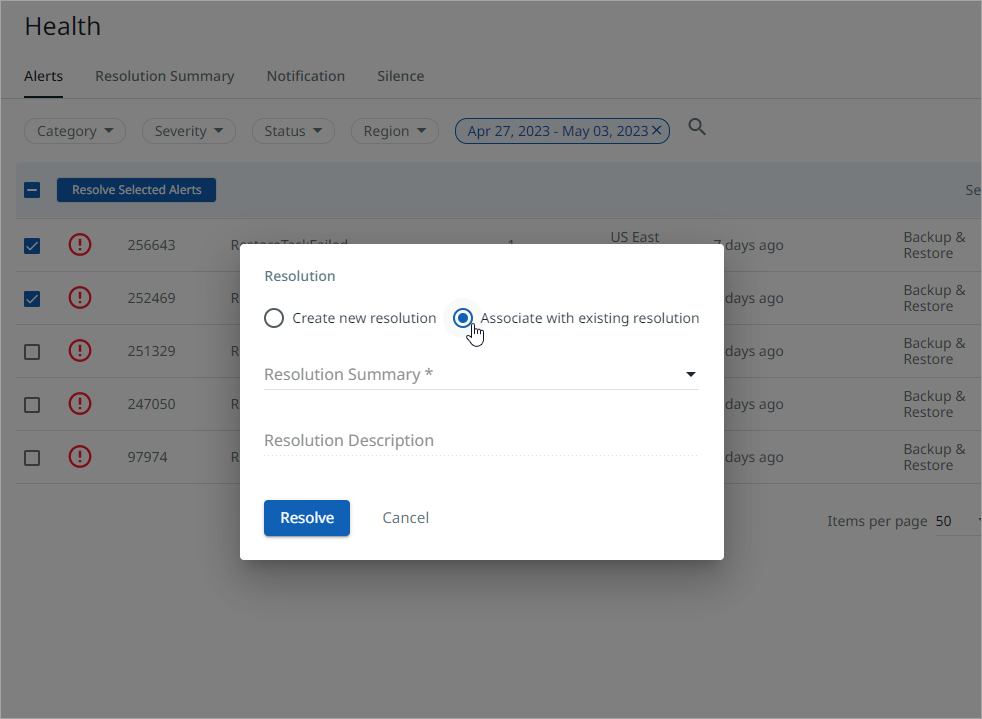
- In the Resolution dialog, do the following:
Select Associate with existing resolution.

- From the Resolution Summary drop-down, you can search and select the resolution that you plan to attach to the alert.
- Click Resolve.
The existing resolution is attached to the selected alerts, and the status of the alert(s) are marked as Resolved.
Resolve an alert in the Details for <Alert_Name> page
Once you have reviewed the alert, you can resolve the alert using the page's Resolution section. You can create a new alert resolution or attach an existing one in the Resolution section.

To create a new resolution:
- In the Resolution section, select Create new resolution.
- In the Resolution Summary field, add a resolution summary for the alert.
- In the Resolution Description field, add a brief description of the resolution.
- Click Resolve.
To attach an existing resolution:
- In the Resolution section, select Associate with existing resolution.
- From the Resolution Summary drop-down, you can search and select the resolution that you plan to attach to the alert.
- Click Resolve.
