Manage Users and Roles
You can create and manage SiteContinuity users and control the permissions assigned to individual users. You can make use of the default roles Helios offers or create custom roles.
SiteContinuity Roles
You can use the default roles that are part of the Helios and create custom roles for SiteContinuity users:
Default Roles
To view the default roles:
-
Click the app-selector menu (
 ) and select Global.
 -
Navigate to Settings > Access Management and click the Roles tab. The names and descriptions of all the default roles are displayed. The default roles relevant to SiteContinuity are:
Roles Description Super Admin
Super Admin users have full access to all actions and workflows within a Helios cluster. They can manage other super admins and admins.
Replication
Replication users can set up and replicate data to another cluster.
DR Admin
DR Admin has viewer role privileges and can create and manage DR workflows and associated tasks.
Viewer
Viewer users have read-only access for all workflows within the Cohesity cluster UI.
Self-Service
Self-Service Data Protection users have viewer role privileges. They can manage Clones, Protection Groups, and Policies and create Recover Tasks.
Cohesity
This role allows Cohesity Support to create a Super Admin user for customers. Only Cohesity Support has access to this role, and it is typically used when the customer has lost access to a Super Admin user due to turnover and other events.
Custom Roles
You can create a custom role that defines a specific set of DR privileges. To add a customer role:
-
Click the app-selector menu (
 ) and select Global.
 -
Navigate to Settings > Access Management and click the Roles tab.
-
Click Add Customer Role. The Add Role page is displayed with some pre-selected Access Management Privileges.
-
Under Role Details, enter the name and description of the custom role.
-
SiteContinuity Service is displayed under Helios Privileges. You can provide one of the following privileges to the custom role:
-
View SiteContinuity. Selected by default. With this privilege, the user is limited to only accessing and viewing all the resources in SiteContinuity without the ability to make any changes to it.
To view the Audit Logs in SiteContinuity, an additional Account Management on Helios privilege needs to be selected.
-
Manage SiteContinuity. With this privilege, the user can perform all DR activities SiteContinuity. To assign this privilege to the custom role, select All or select Manage SiteContinuity.

-
SiteContinuity Users
To manage user access to your SiteContinuity, Cohesity recommends that you add users. Once you create them, your users can start using SiteContinuity with their logins.
Add Users

To add a user:
-
Click the app-selector menu (
 ) and select Global.
 -
Navigate to Settings > Access Management and click the Users tab.
-
Click Add User.
-
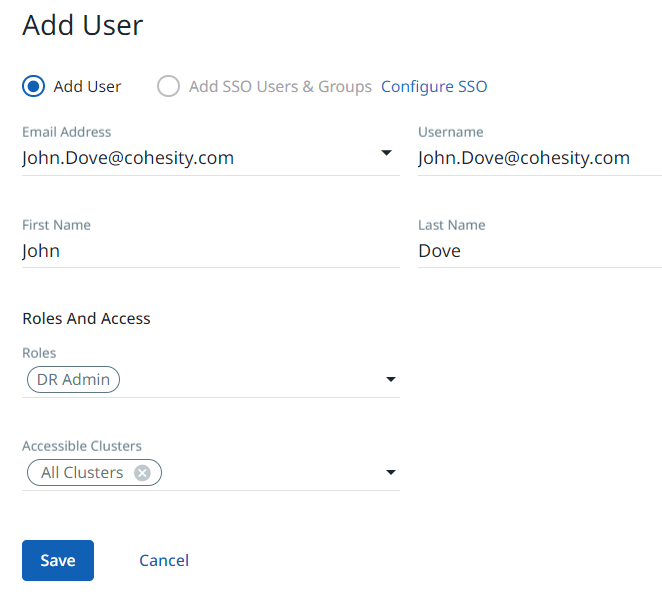
In the dialog, select Add User and enter:
-
Email Address. The user’s email address.
-
Username. Same as the Email address. Helios auto-populates this field with the email address entered in the Email Address field.
-
First Name. The user's first name.
-
Last Name. The user’s last name.
-
Roles. Select a role. For more details, see SiteContinuity Roles.
-
Accessible Clusters. Displays all the Cohesity clusters registered and actively connected with your Helios account. Select a 7.1 or a later Cohesity cluster that you want the SiteContinuity user to access and manage.
-
-
Click Save.
The new user is displayed in the Users tab on the Access Management page.
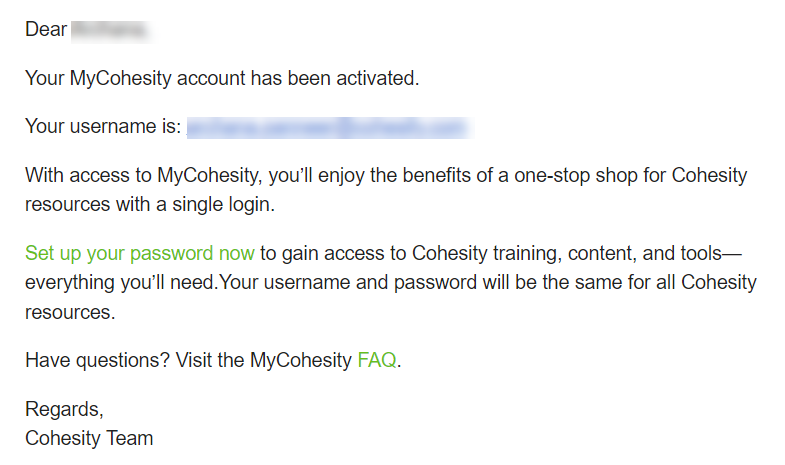
The new user receives a welcome email with a link to set up the password. Once the user sets the password, they are redirected to the MyCohesity page. From the MyCohesity page, users can sign in to Helios and use SiteContinuity. For details, see Sign In to Helios .

Manage Users
To manage SiteContinuity users:
-
Click the app-selector menu (
 ) and select Global.
 -
Navigate to Settings > Access Management.
-
Under the Users tab, to change a user's settings, click the Actions menu (⋮) of the user. Tip: You can also manage user details by clicking on the user row to open the User Details page.
-
You can select:
-
Edit. To update a user’s email address, first name, and/or last name.
-
Delete. To delete a user from your Helios account.
-
Reset Password. To send the user an email with a link to reset their password.
-
You cannot delete a user who is a Super Admin.
Single Sign-On for SiteContinuity Users
You can now configure Cohesity Data Cloud to use an Identity Provider (IdP), such as Okta, for single sign-on (SSO) access. Cohesity Helios must be added as an application to your IdP, such as Okta. The SSO must then be configured along with the SSO URL and certificate file in Helios. After the integration, users can sign in to Helios using either the IdP sign-in page or signing in with the SSO link on the Helios login page. The following identity providers are supported:
|
Identity Provider |
Documentation Link |
|---|---|
|
Active Directory Federation Services (AD FS) |
Configure SSO with Active Directory Federation Services (AD FS) |
|
Azure |
|
|
Duo Single Sign-on |
|
|
Ping Identity |
|
|
Okta Single Sign-on |
Configure SSO
To enable SSO for SiteContinuity users, you must configure SSO in Helios.
Add SSO Users & Groups
After configuring SSO, you can add SSO users and groups for SiteContinuity.
