Recover Your Amazon S3 Buckets
After you protect your Amazon S3 buckets, you can recover them to their original location or a new location using Cohesity Cloud Protection Service.
Recover Amazon S3 to Original Location
To recover your protected Amazon S3 buckets to their original location:
-
In Cloud Protection Service, navigate to Sources.
-
Click the Source name.
-
Select Protection Status > Protected.
-
Use the filters, search box, and views to locate and select the Amazon S3 buckets you want to recover.
You can also use Global Search to locate, filter, and select the objects you need. Click the Global Search box at the top or type slash (/) anywhere to start your search.
-
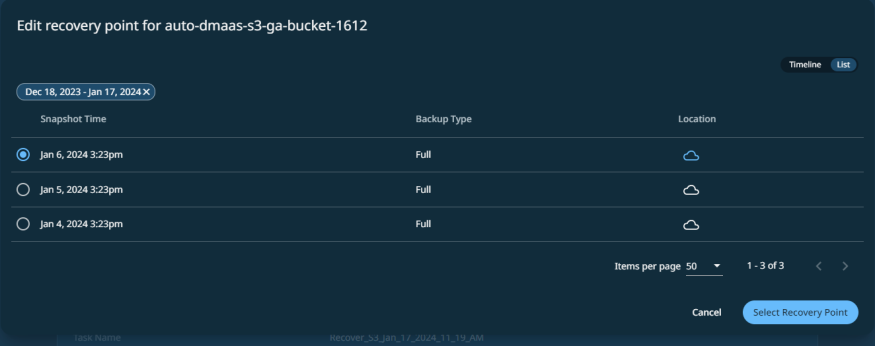
Click the Recover icon at the top to open the New Recovery form. By default, the Latest snapshot is pre-selected for recovery. If you need to recover from an earlier snapshot, click the Edit (pencil) icon to choose the desired snapshot. You can also select any point from the green solid line on the slider if you want to restore to a specific point in time. Selecting an invalid time from the slider automatically selects the closest available snapshot.
-
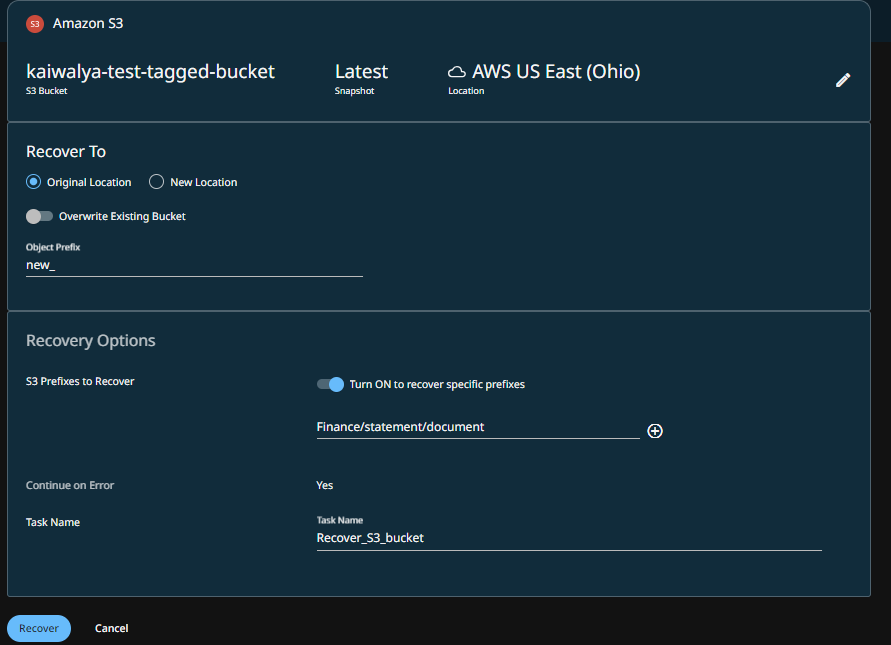
Under Recover To, select Original Location.
-
Enable Overwrite Existing Bucket if you want to recover the Amazon S3 bucket by overwriting the original Amazon S3 bucket. By default, this option is disabled.
If the data in the source Amazon S3 object and target Amazon S3 are the same, then the target Amazon S3 will not be updated even if the Overwrite Existing Bucket option is enabled. If the target bucket is versioned and the Amazon S3 object name of the target and the source match, then a new version of the Amazon S3 object will be created.
-
In the Object Prefix field, add prefix value to the names of the Amazon S3 objects that are recovered by this task. For information about the Amazon S3 object naming convention, see AWS documentation.
-
Select your Recovery Options:
-
S3 Prefixes to Recover: To perform granular recovery the Amazon S3 bucket, enable the Turn ON to recover specific prefixes option and provide the prefix of the objects to be recovered.
For example,
Finance/statement/documentYou can click the add icon to provide multiple prefixes.
The maximum number of prefixes that you can provide per recovery task is 100.
-
Continue on Error: Enable this option if you want to continue the recovery even if one of the S3 objects encounters an error. By default, this option is disabled and the recovery operation will fail if one of the objects encounters an error.
-
Task Name: Change the default name of the recovery task.
-
-
Click Recover.
Cohesity Cloud Protection Service begins to restore the selected Amazon S3 bucket.
Recover Amazon S3 to New Location
To recover your protected Amazon S3 buckets to a new location:
-
In Cloud Protection Service, navigate to Sources.
-
Click the Source name.
-
Select Protection Status > Protected.
-
Use the filters, search box, and views to locate and select the Amazon S3 you want to recover.
You can also use Global Search to locate, filter, and select the objects you need. Click the Global Search box at the top or type slash (/) anywhere to start your search.
-
Click the Recover icon at the top to open the New Recovery form. By default, the Latest snapshot is pre-selected for recovery. If you need to recover from an earlier snapshot, click the Edit (pencil) icon to choose the desired snapshot. You can also select any point from the green solid line on the slider if you want to restore to a specific point in time. Selecting an invalid time from the slider automatically selects the closest available snapshot.
-
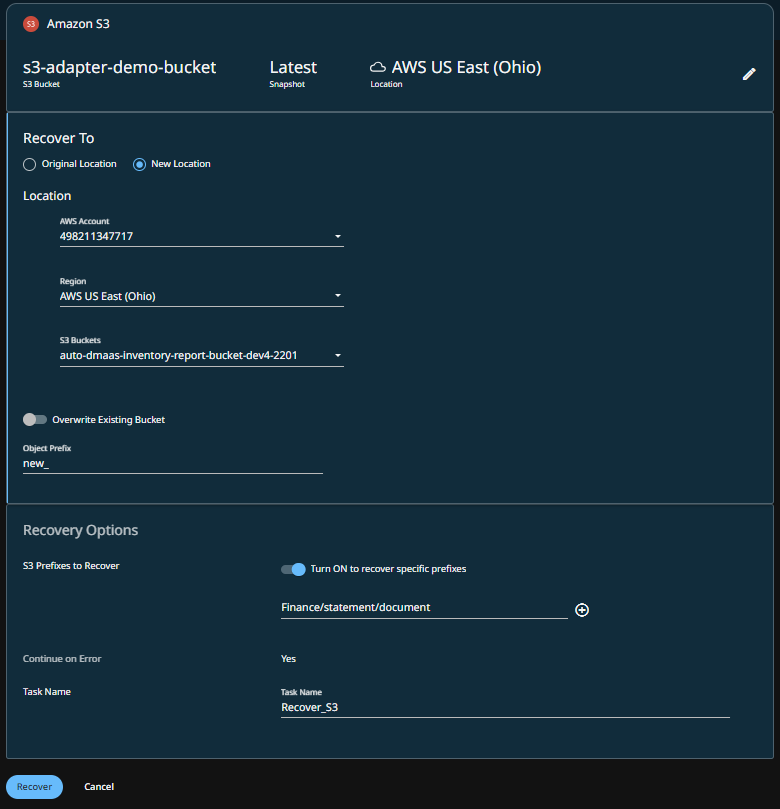
Under Recover To, select New Location and provide the following information:
-
AWS Account: Select a registered AWS account as the new recovery destination.
-
Region: Select a destination AWS region.
The target bucket must be in the same cloud region where your data is backed up (Cohesity-managed SaaS platform).
-
S3 Bucket: Select the Amazon S3 bucket on to which you want to recover.
-
-
Enable Overwrite Existing Bucket if you want to recover the Amazon S3 bucket by overwriting the original S3 bucket. By default, this option is disabled.
If the data in the source Amazon S3 object and target Amazon S3 are the same, then the target Amazon S3 will not be updated even if the Overwrite Existing Bucket option is enabled. If the target bucket is versioned and the S3 object name of the target and the source match, then a new version of the Amazon S3 object will be created.
-
In the Object Prefix field, add prefix value to the names of the Amazon S3 objects that are recovered by this task. For information about the Amazon S3 object naming convention, see AWS documentation.
-
Select your Recovery Options:
-
S3 Prefixes to Recover: To perform granular recovery the Amazon S3 bucket, enable the Turn ON to recover specific prefixes option and provide the prefix of the objects to be recovered.
For example,
Finance/statement/documentYou can click the add icon to provide multiple prefixes.
The maximum number of prefixes that you can provide per recovery task is 100.
-
Continue on Error: Enable this option if you want to continue the recovery even if one of the Amazon S3 objects encounters an error. By default, this option is disabled and the recovery operation will fail if one of the objects encounters an error.
-
Task Name: Change the default name of the recovery task.
-
-
Click Recover.
Cohesity Cloud Protection Service begins to restore the selected Amazon S3.
