Protect Your Amazon DynamoDB Tables
Once you have registered your AWS account, you are ready to protect the Amazon DynamoDB tables in that account. Cohesity supports the protection of both the DynamoDB Standard table class and the DynamoDB Standard-Infrequent Access (DynamoDB Standard-IA) table class.
Before you Begin
Before protecting your Amazon DynamoDB tables, ensure you have met the prerequisites and understood the considerations.
Add Protection for Amazon DynamoDB Tables
To protect your Amazon DynamoDB tables:
-
In DataProtect as a Service, navigate to Sources.
-
Find the registered AWS account and click into it.
-
Click the DynamoDB tab.
-
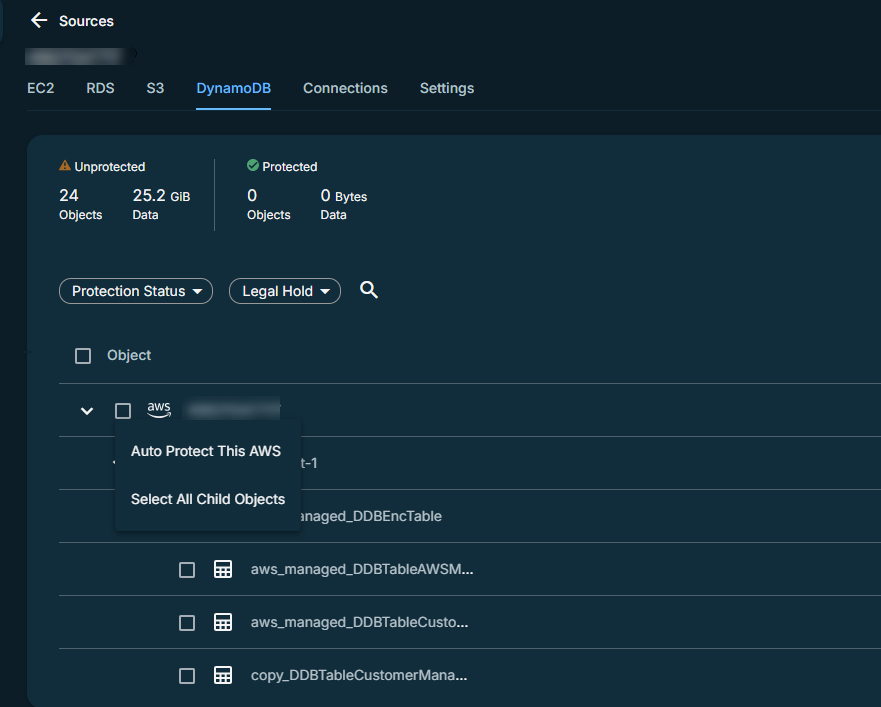
Use the checkboxes to select the objects for protection. To protect the whole source, click the Object checkbox above the column.
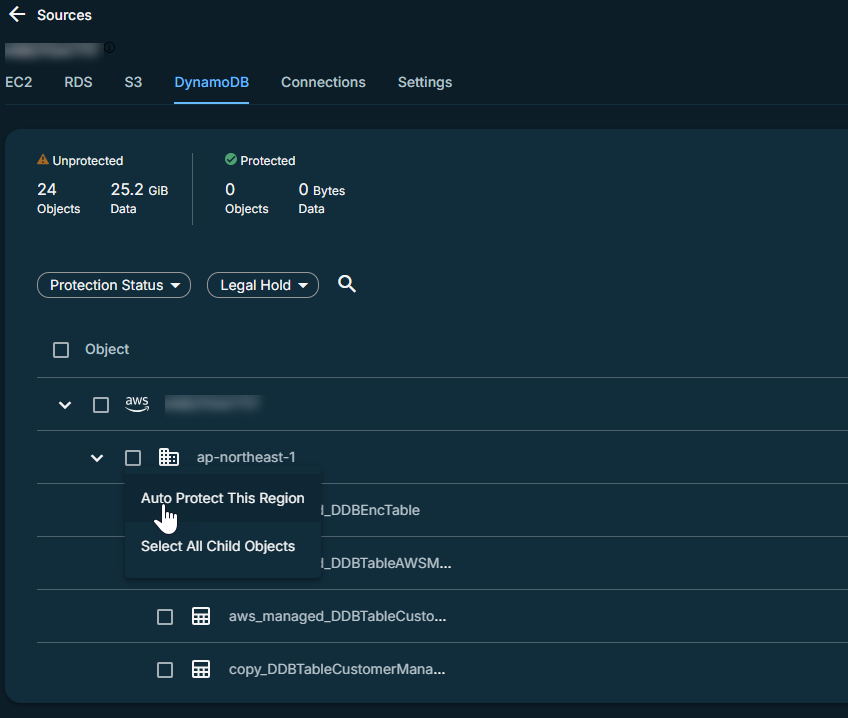
Optionally, you can configure auto-protect at the AWS account and region level. When this option is enabled at a particular level, all the Amazon DynamoDB tables that are added to that level in the future are automatically protected from the next protection run. Additionally, you can also perform tag-based auto-protection of Amazon DynamoDB tables.
-
To auto-protect the Amazon EC2 instances based on the hierarchy level, click the Hierarchy View icon located at the right corner of the page, and perform one of the following steps listed in the table below:
To auto-protect the Amazon EC2 instances
Action
At the account level Select the checkbox of the AWS account, and then select Auto Protect This AWS.
At the region level Select the checkbox of the subscription, and then select Auto Protect This Region.
You can exclude individual Amazon DynamoDB tables from auto-protection by clicking the auto-protect icon (
 ) next to the table. The Amazon DynamoDB tables excluded from auto-protection are displayed with the exclude (
 ) icon.
 -
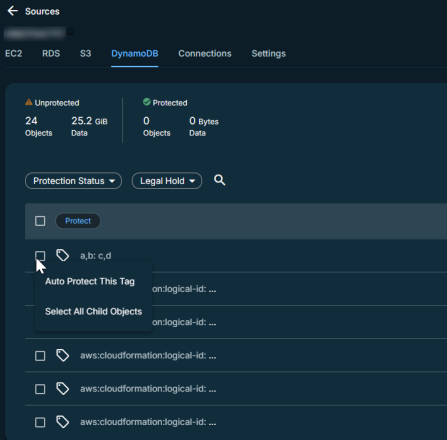
To auto-protect the Amazon DynamoDB tables based on tag, click the Tag icon at the right corner of the page. Select the checkbox of a tag and then select Auto Protect This to auto-protect the Amazon DynamoDB tables with this tag.
-
-
Click the Protect icon above the checkboxes.

-
To exclude auto-protection of Amazon DynamoDB tables based on Tags:
-
Click the edit icon displayed next to Add Objects.
-
Click the Tags icon located at the right corner of the page.
The tags associated with the VMs are displayed.
-
Click the exclude icon next to the tag to exclude the auto-protection of the tags associated with that tag.
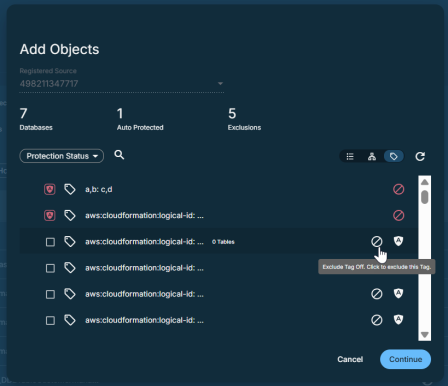
If an Amazon DynamoDB table has multiple tags with Auto Protect and Exclude applied, exclusion takes precedence. These excluded Amazon DynamoDB tables are also excluded even if a parent object is auto protected.
-
-
Click Continue.
-
Choose a policy to specify backup frequency and retention. If you don't have a policy, you can easily create one.
-
If you wish to change or configure any of the additional settings, select More Options and perform the steps below or else, click Protect.
-
Under Settings, edit the Start time option if necessary:
Start time Indicates what time the protection run should start. Enter the Start Time and select AM or PM. The default time zone is the browser's time zone. You can change the time zone of the protection run by selecting a different time zone here.
-
Under Additional Settings, configure the following option:
-
End Date: If you need to end protection on a specific date, enable this to select the date.
-
SLA: Defines how long the administrator expects a protection run to take. Enter:
-
Full. The number of minutes you expect a full protection run, which captures all the blocks in an object, to take.
-
Incremental. The number of minutes you expect an incremental protection run, which captures only the changed blocks in an object, to take.
-
-
-
Click Protect.
Cohesity starts backing up the Amazon DynamoDB tables you selected. You can monitor the status of the backup in the Activity page.
