Add Roles to Microsoft 365 User Account
Cloud Protection Service accesses your Microsoft 365 domain with a user account to back up your Microsoft Exchange Online data. You can either add these roles to an existing user account or create a new user account with these roles.
Ensure that multi-factor authentication is not enabled for the user account.
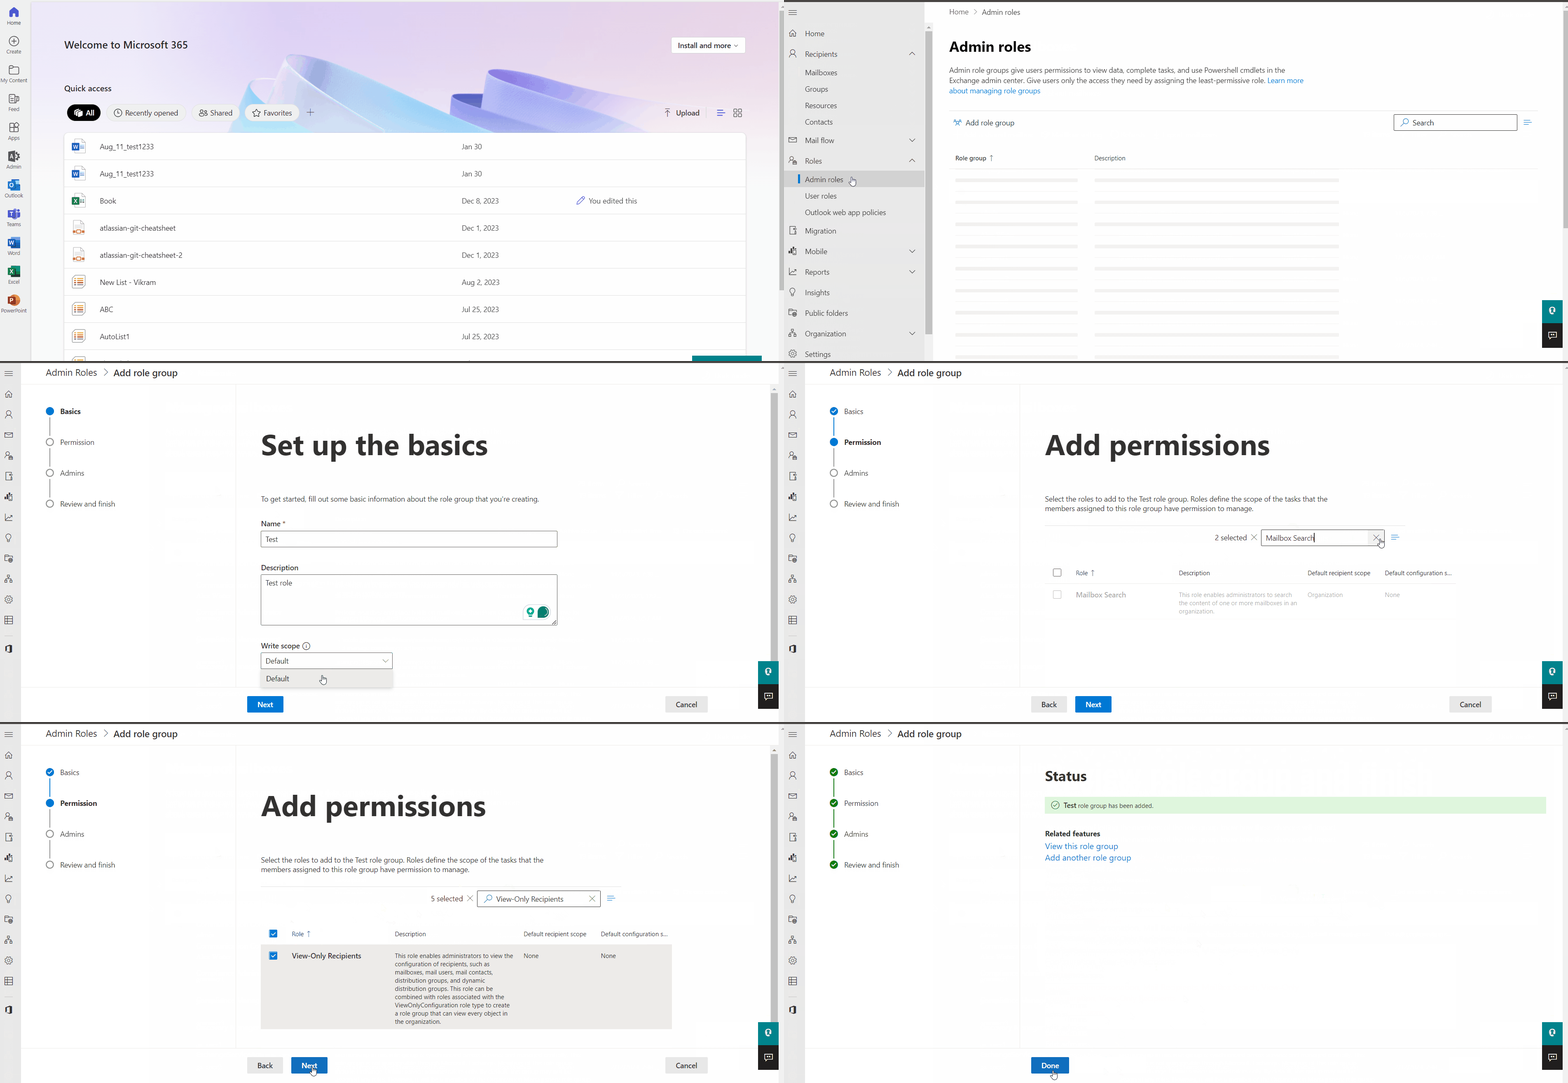
To add roles to the Microsoft 365 service user account:
-
Log in to Microsoft 365.
-
In the Office 365 page, click Admin.
-
In the Microsoft 365 admin center page, select Admin centers, and then click Exchange.
-
Select Roles > Admin roles.
-
In the Admin roles page, click Add role group.
-
On the Add role group page , do the following:
-
Under Basics, enter a Name and Description for the admin role and from the Write scope drop-down, select Default and click Next.
-
Under Permissions, select the following and click Next:
-
Mail Recipients -
Mailbox Search -
View-Only Configuration -
View-Only Recipients
-
-
Under Admins, search and select the user account you plan to use to register the Microsoft 365 domain with CCloud Protection Service, then click Next.
-
Under Review and finish, review the configuration and click Add role group.
-
After the role group is added, click Done.
You are ready to update your Microsoft 365 Org setting for Mailbox size reporting.
-
Here is the GIFF you can refer to add roles to the Microsoft 365 service user account:

