Configure SSO with Azure
This topic provides step-by-step instructions on creating an Azure Active Directory application.
Perform the following steps to create an Azure AD SSO:
-
Log in to Azure portal.
-
Under Azure services, click Azure Active Directory. If Azure Active Directory is not listed, click More Services and select Azure Active Directory.

-
On the left, click Enterprise applications.
-
Under All applications, click New Application.

-
On the Browse Azure AD Gallery page, click Create your own application.

-
In the What’s the name of your app, enter a display name for your application.
-
Select Integrate any other application you don’t find in the gallery (Non-gallery) and click Create.

-
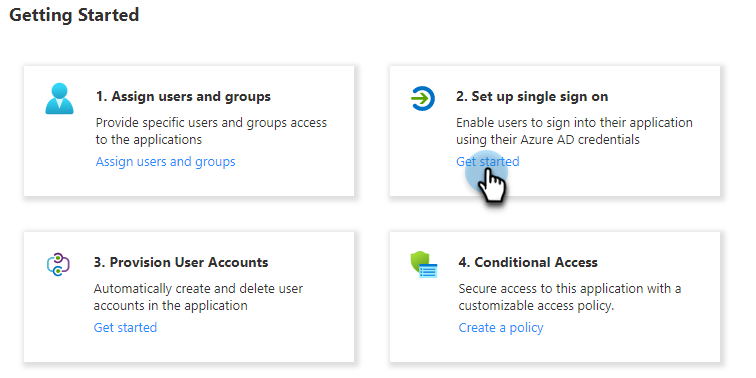
On the <app> Overview page, under General Settings, on the Set up single sign on tile, click Get Started.
-
Under Select a single sign-on method, click the SAML tile.
-
Under Set up Single Sign-On with SAML, do the following:
-
In the Basic SAML Configuration section, click the edit
icon and do the following:
-
Under Identifier (Entity ID), click Add identifier.
For example,
https://helios.cohesity.com/v2/mcm/idp/authenticate -
Under Reply URL (Assertion Consumer Service URL), click Add reply URL.
For example,
https://helios.cohesity.com/v2/mcm/idp/authenticate -
Click Save.
-
-
In the Attributes & Claims section, click the edit
icon and do the following:
-
Click Add new claim.
The Manage claim page is displayed.
-
Name: Enter a name for the attribute.
-
Source: Select Attribute.
-
Namespace: Optional. Enter a namespace URI.
-
Source attribute: From the drop-down, select the source attribute.
-
Click Save.

-
-
If you plan to use user groups-based RBAC, you need to pass the “Groups” SAML attribute to Cohesity. Perform the following steps:
-
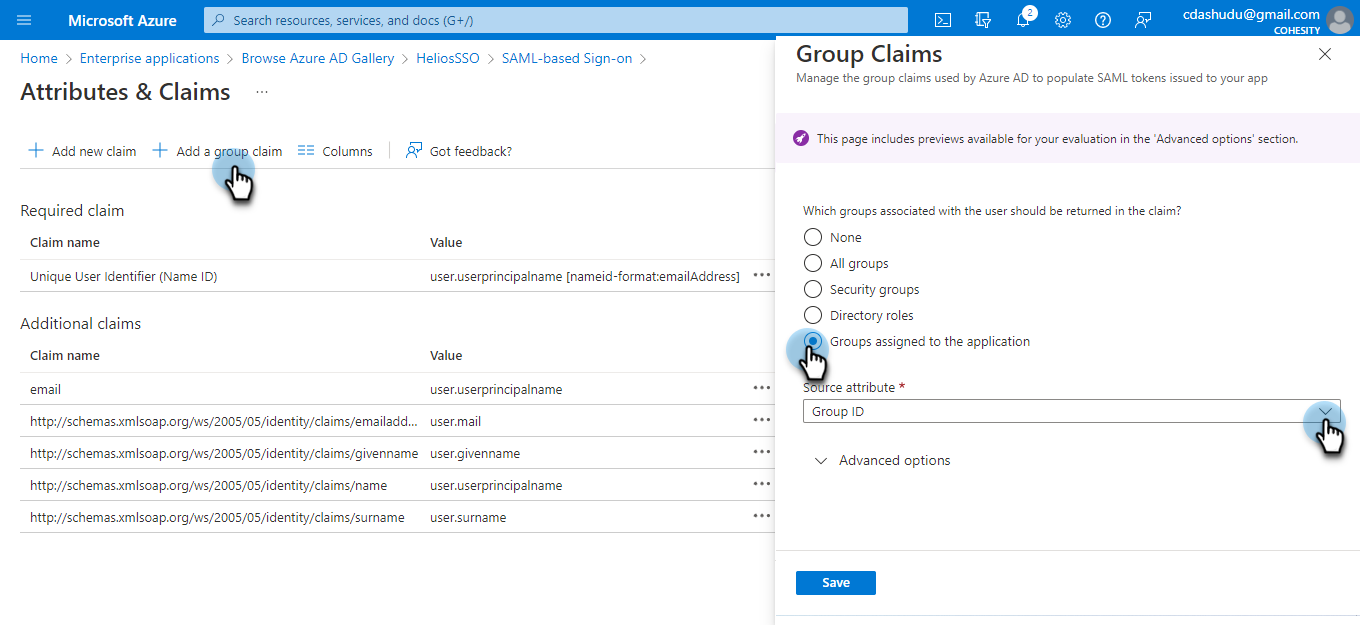
Under User Attributes & Claims, click Add a group claim.
-
For Which groups associated with the user should be returned in the claim?, select Groups assigned to the application.
Groups must be directly assigned to the application. Azure will not send the groups attribute that are a subgroup of a group which is assigned to the application.
-
From the Source attribute drop-down, select the source attribute.
-
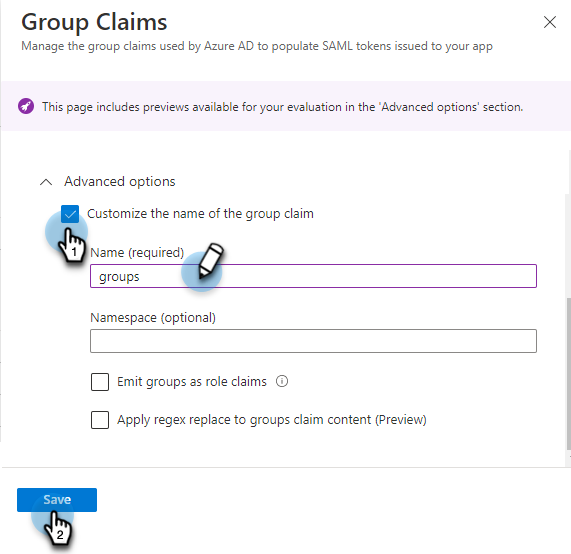
Under Advanced options:
-
Select the Customize the name of the group claim check box.
-
Name: Enter a name as groups.
-
Namespace: Enter the namespace URI. This is optional.
-
Click Save.
To use source attributes like sAMAccountName to pass the user group name in the “Groups” SAML attribute make sure that Azure AD groups are synchronized from an on-premises Active Directory using Azure AD Connect Sync 1.2.70.0 or above. For more information, see Azure AD Connect: Upgrade from a previous version to the latest.
If you don’t have an on-prem Active Directory synced with Azure AD, in the Source attribute drop-down, select Group ID.
Ensure the "Groups" field is entered as a string, either as a single group (e.g., "group1") or a comma-separated list (e.g., "group1,group2"). This format allows Cohesity to match Azure AD group names with the configured SSO groups.
Cohesity recommends using cloud-only Azure AD group names. Alternatively, you can use the sAMAccountName or Group Object ID.
-
-
-
Depending on the value of the Source attribute you selected, you need to create the corresponding users and groups. For example, if you use:
-
sAMAccountName, you need to create groups with the SSO Group value as the AD groups name.
-
Group ID, you need to create SSO groups using Azure AD’s Group ID. To obtain the Azure AD’s Group ID:
-
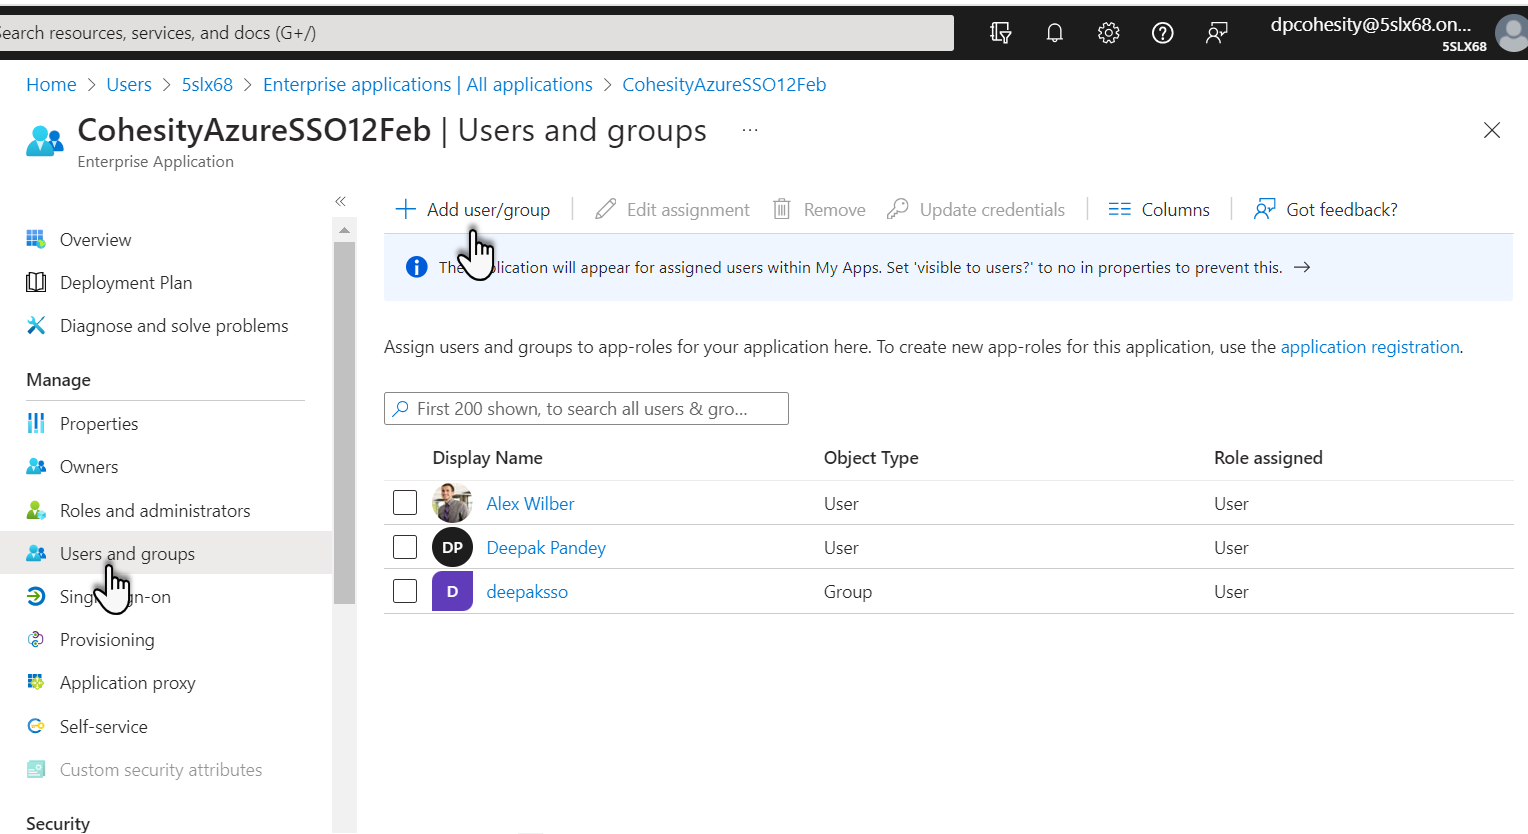
Click the application name
-
Under Manage, click Users and groups.
-
Click Add user/group to assign a user or a group who should be able to access Cohesity Cloud Protection Service using this Azure AD application.
-
From the list of users, click a user.
Nested groups are not supported and will not be passed under the Groups SAML attributes.
-
-
-
Retrieve the SSO URL, Provider Issuer ID, and Certificate
You need to retrieve Azure AD information to configure SSO on Cohesity Cloud Protection Service for the IdP (Azure AD).
Perform the following steps to retrieve the SSO URL, Entity ID, and certificate from the Azure AD application:
-
Log in to Azure portal.
-
Under Azure services, click Azure Active Directory. If Azure Active Directory is not listed, click More Services and select Azure Active Directory.
-
On the left, click Enterprise applications.
-
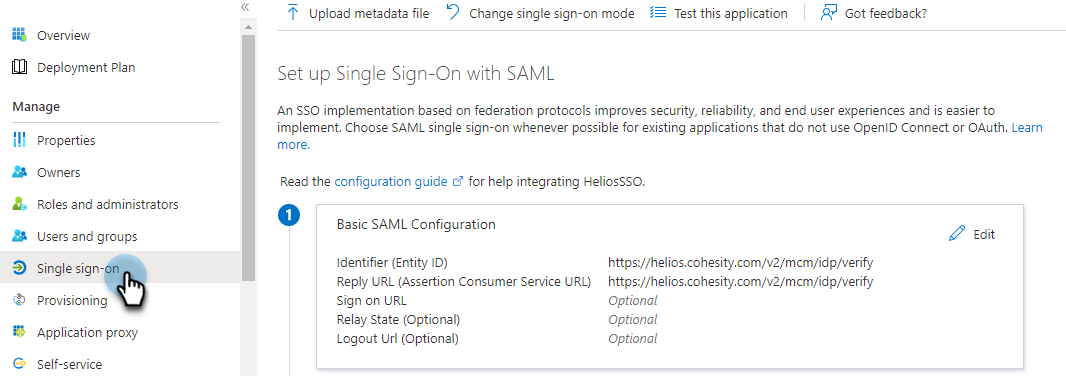
Click the application name and under Manage, click Single sign-on.
-
Under Set up Single Sign-On with SAML, in the SAML Signing Certificate section, click the edit
icon.
-
On the SAML Signing Certificate, click the ellipsis (
 ) icon and select PEM certificate download.
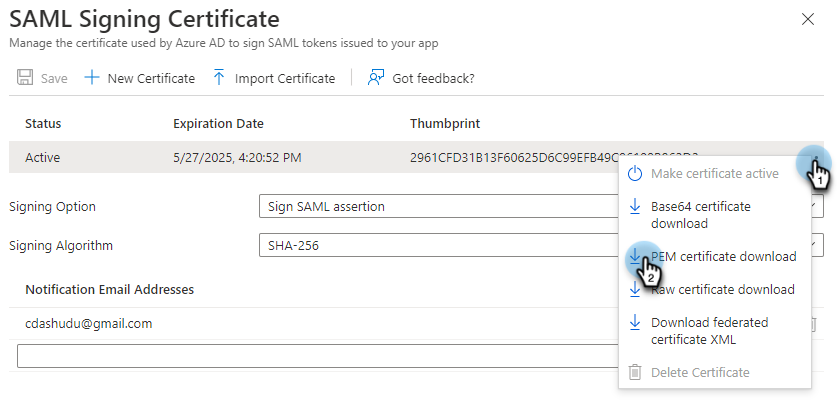
Cohesity SSO only accepts
*.pemformat certificate. -
Under Manage, click Single sign-on.
-
Under Set up Single Sign-On with SAML, in the Set up <application name> section, do the following:
-
Copy the Login URL and save it for later use. You will use this URL to enter the Cohesity Single-Sign-On URL when you Configure SSO to Cohesity.

-
Copy the Azure AD Identifier URL and save it for later use. You will use this URL to enter the Cohesity Provider Issuer ID when you Configure SSO to Cohesity.

-
You need to add the SSO provider in Cohesity Cloud Protection Service. For more information, see Configure SSO .
