Configure SSO with Active Directory Federation Services (AD FS)
This topic provides step-by-step instructions on configuring and using Active Directory Federation Services (AD FS) on Cohesity SSO.
Prerequisites
-
Install AD FS on the server. For more information, see Deploy and configure AD FS.
-
An Active Directory instance where all users have an email address attribute.
-
A server running Microsoft Server 2016, 2012, or 2008.
-
An SSL certificate to sign your AD FS login page and the Signing Certificate for that certificate.
-
An installed certificate for hosted SSL.
Add a Relying Party Trust (RPT)
Perform the following steps to add a Relying Party Trust (RPT) to enter the Cohesity SSO authenticate URL via the SAML 2.0 WebSSO protocol.
-
Log in to the server and open AD FS.
-
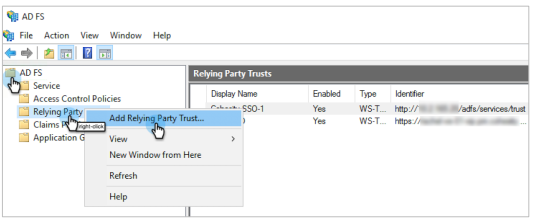
Under AD FS, right-click Relying Party Trusts and select Add Relying Party Trust.
The Add Relying Trust Party Wizard page is displayed.
-
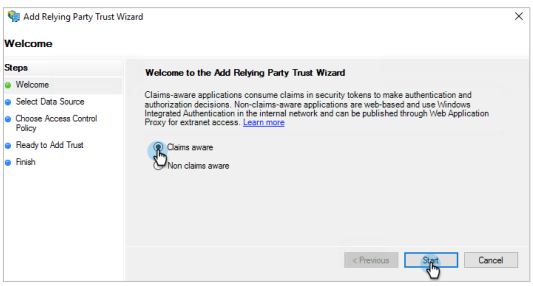
Select Welcome, select Claims aware, and then click Start.
-
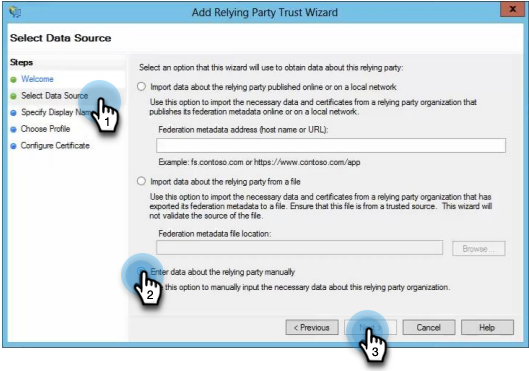
Under Select Data Source, select Enter data about the relying party manually and click Next.
-
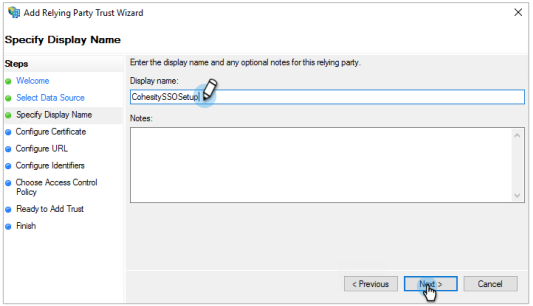
Under Specify Display Name, in the Display name field, enter a display name and click Next.
-
Under Configure Certificate, leave the default certificate settings and click Next.
-
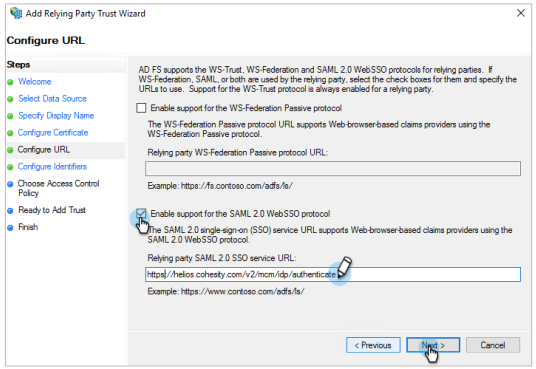
Under Configure URL, do the following:
-
Select the Enable Support for the SAML 2.0 WebSSO protocol check box.
-
In the Relying party SAML 2.0 SSO service URL field, enter :
https://helios.cohesity.com/v2/mcm/idp/authenticate
-
-
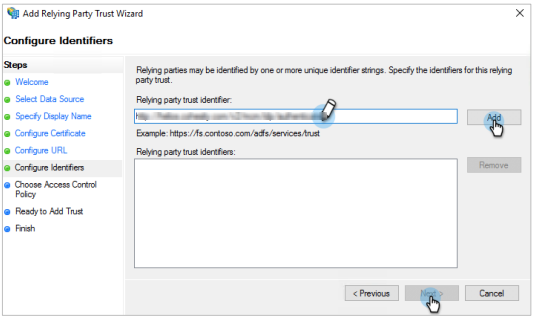
Under Configure Identifiers, do the following:
-
In the Relying party trust identifier field, enter
https://helios.cohesity.com/v2/mcm/idp/authenticate
-
Click Add and then click Next.
-
-
Under Choose Access Control Policy, you can optionally configure multi-factor authentication (MFA) and click Next. For more information, see Configure Additional Authentication Methods for AD FS.
-
Under Ready to Add Trust, see an overview of the settings and click Next.
-
Under Finish, click Close.
Create Claim Rules
Cohesity looks for SAML attributes to identify users and assign roles.
Perform the following steps to pass SAML attributes:
-
Log in to the server and open AD FS.
-
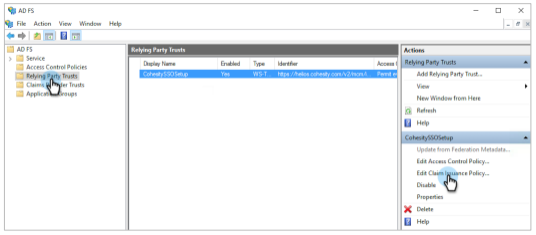
Under AD FS, select Relying Party Trusts and select the RPT that you added.
-
On the right, click Edit Claim Issuance Policy.
-
Click Add Rule.
The Add Transform Claim Rule Wizard page is displayed.
-
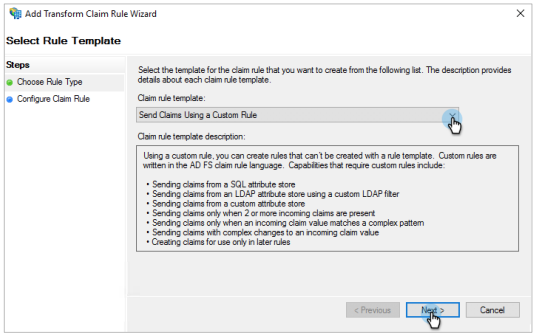
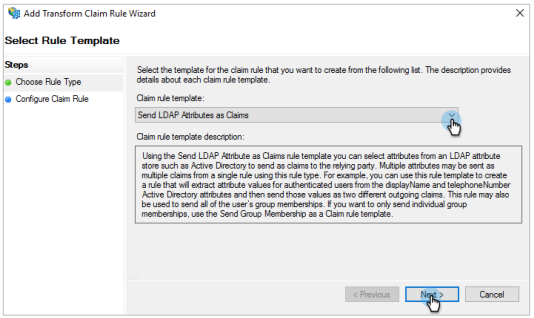
Under Select Rule Template, do the following:
-
From the Claim rule template drop-down, select Send LDAP Attributes as Claims.
-
Click Next.
-
-
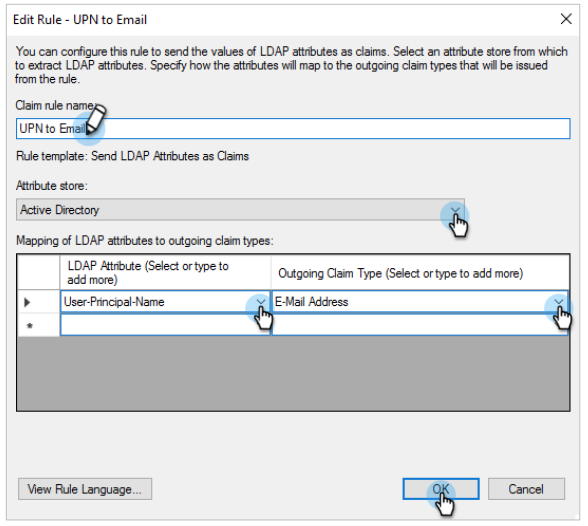
Under Edit Rule, do the following:
-
In the Claim rule name field, enter a name.
-
From the Attribute store drop-down, select Active Directory.
-
In the Mapping of LDAP attributes to outgoing claim types table:
-
Under LDAP Attribute (Select or type to add more), from the drop-down, select User-Principal-Name.
-
Under Outgoing Claim Type, from the drop-down, select E-Mail Address.
-
Click OK.
-
-
-
Click Add Rule to create another rule.
-
From the Claim rule template drop-down, select Transform an Incoming Claim.
-
Click Next.
-
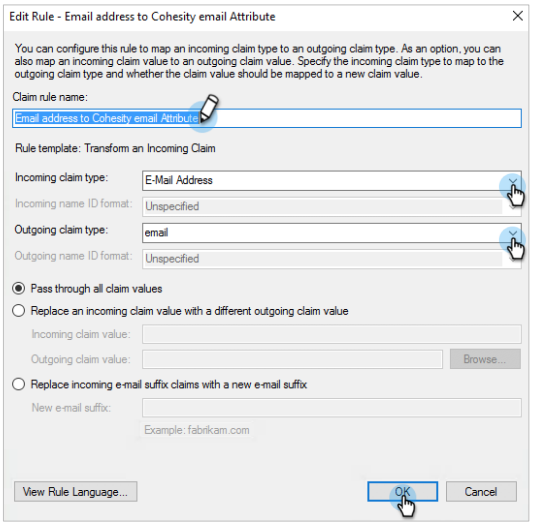
Under Edit rule, do the following:
-
In the Claim rule name field, enter a name.
-
From the Incoming claim type drop-down, select E-Mail Address.
-
From the Outgoing claim type drop-down, select email.
-
Click OK.
-
-
Follow the steps above to pass group SAML attributes.
-
To extract the user group name and send it to Cohesity, you need to create a custom rule in AD FS:
-
Click Add Rule to create the custom rule.
-
From the Claim rule template drop-down, select Send Claims Using a Custom Rule.
-
Click Next.
-
Under Edit rule, do the following:
-
In the Claim rule name field, enter a name.
-
In the Custom rule field, create and enter a custom rule. For more information, see Understanding Claim Rule Language in AD FS.
-
Click OK.
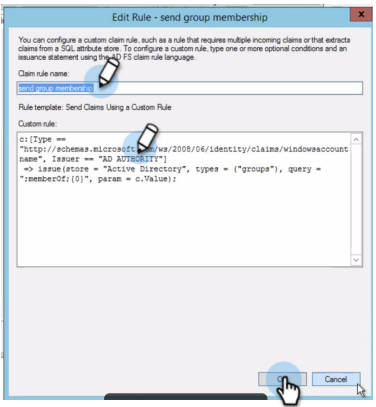
This rule might be different for different AD FS configurations. Make sure to edit the custom rule accordingly. For more information, see When to Use a Custom Claim Rule.
-
-
Retrieve the SSO URL, Provider Issuer ID, and Certificate
You need to retrieve the Federation Service name and Federation Service Identifier which is required when adding AD FS as an SSO provider to Cohesity.
Perform the following steps to retrieve the Federation Service name and Federation Service Identifier:
-
Log in to the server and open AD FS.
-
Right-click AD FS and select Edit Federation Service Properties.
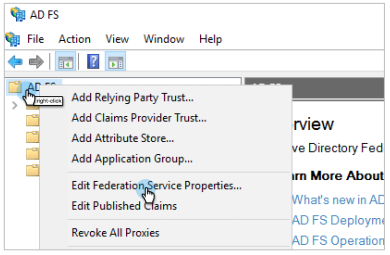
-
Copy the Federation Service name and the Federation Service Identifier and save it for later use. You will need these when you Configure SSO to Cohesity.
-
To download the certificate, navigate to AD FS > Service > Certificates.
-
Under Token-signing, right-click the certificate and select View Certificate.

-
Click the Details tab and then click Copy to File.
The Certificate Export Wizard page is displayed.

-
Select Base-64 encoded X.509 (.CER), click Next, and follow the instructions to download the certificate (.cer).
-
Convert certificate file from the
.certo the.pemformat.To convert the file:
-
On Mac/Linux, rename the file with the
.pemfilename extension. -
On Windows, run the following command:
openssl x509 -in mycert.crt -out mycert.pem -outform PEM
-
Consideration
Cohesity Cloud Protection Service does not support Sign Auth Requests to sign the SAML requests to the ADFS server.
