Manual Registration for Azure Source
To start protecting your Microsoft Azure services, check the Azure requirements and then register Azure as a data source in
-
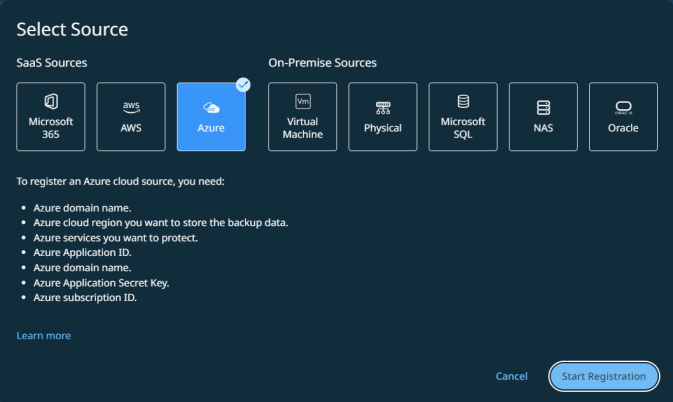
In Cloud Protection Service, navigate to Sources > + Register Source, and then select Azure.

-
Click Start Registration.
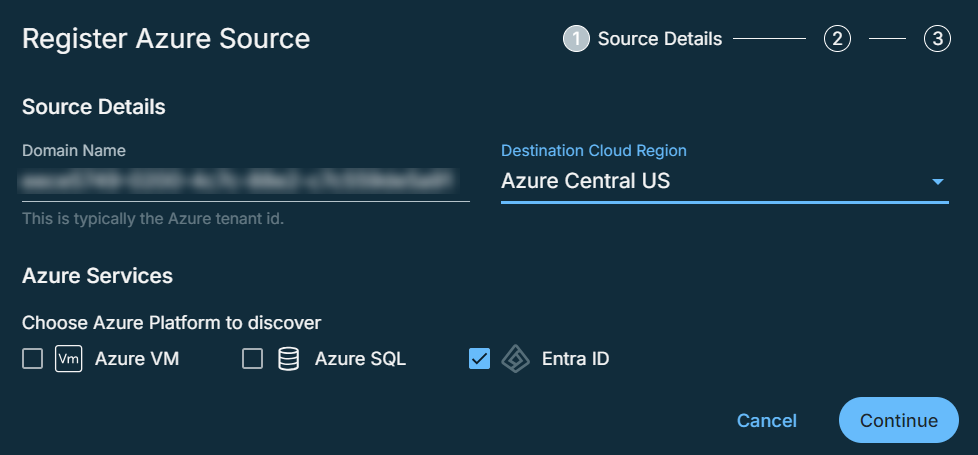
The Register Azure Source form appears.
-
In the Domain Name field, enter the unique tenant ID assigned by Azure, and then select the Destination cloud region. For information on getting the tenant ID, see Get tenant ID.
-
Select the Azure services you want to register:
-
Azure VM
-
Azure SQL
-
Entra ID
-
Azure Kubernetes
Azure VM is selected by default.
-
-
Click Continue.

-
In the Azure App ID field, enter the application ID assigned by Azure during the service principal creation process.
-
In the Azure App Secret Key field, enter the application secret key for setting up the authentication for the service principal.
-
Click Continue.

-
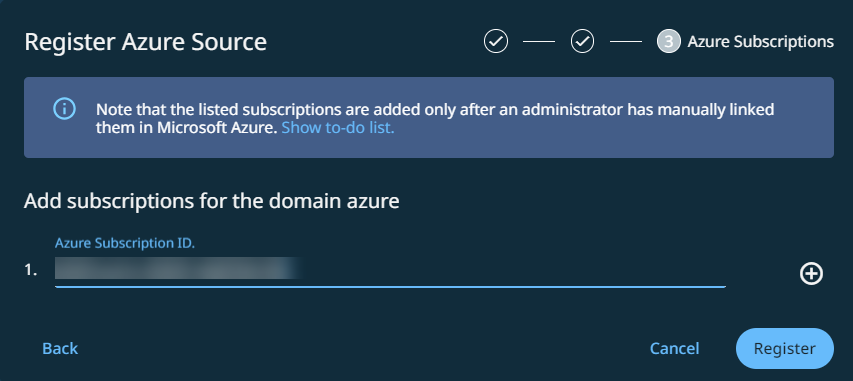
In the Azure Subscription ID field, enter the subscription IDs of the subscriptions where the VM or Azure SQL database or Entra ID or Kubernetes you want to protect belongs to.
-
Click Register.
Next > Once you register the Azure source, you must set up a SaaS Connection (not applicable for Entra ID) for each region under each Azure subscription in your Azure source.
The steps and sections below apply only to Kubernetes.
-
After clicking Register in Step 11, the Sources page will appear. Select the source listed under Azure > Source.
All Azure sources associated with the selected subscription ID are automatically discovered. -
On the Sources page, select the Azure Kubernetes tab. A hierarchical view is displayed, showing the Tenant ID, Application ID, and Resource Groups. Within each Resource Group, all autodiscovered Kubernetes clusters are listed.
-
Select any Kubernetes cluster that you want to register and click Kubernetes Credentials.
The Kubernetes Credentials page appears. -
In the Password-Bearer Token field, enter the Bearer token ID of the Kubernetes service account. For information on obtaining the Bearer token ID, see Kubernetes Requirements.
-
Datamover Image: Enter the location where you have the Datamover image saved in your Docker registry. The image must be entered in the format:
<Image_name>:<TAG>.To protect the namespace level data in Vanilla Kubernetes 1.22 clusters, use the DataMover version that matches closely with your Cohesity cluster version. For more information, see Upgrade Velero and Datamover.
-
(Optional)Service Type: Enable this field to route external traffic to your Kubernetes cluster node via dedicated VLANs.
From the drop-down, select one of the following service types:
-
NodePort service type allows you to route external traffic through a fixed port (which you can set within the range of 30000-32767) on every Kubernetes node. In a NodePort setup, external traffic has direct access to the Kubernetes node.
-
Load Balancer service type allows you to route external traffic via an external Load Balancer functionality. Load Balancers monitor the availability of your Kubernetes pods and route incoming service requests to the relevant pods. In a Load Balancer setup, external traffic has access to the Kubernetes node through the Load Balancer only.
Service Annotation Key and Service Annotation Value
Enter the Service annotation key-value pairs. These key-value pairs are utilized to store metadata that offers information about the selected Kubernetes service that Cohesity deploys. This metadata does not affect the behavior of the Kubernetes cluster.
-
-
(Optional)Velero Image: Enter the location where you have the Velero image saved in your Docker registry. If you leave this field blank, then the Velero image will be pulled from a public image registry on the internet. You can download the Cohesity Velero Image from the Cohesity Downloads page.
You need Velero 1.8.1 to protect the namespace level data in Vanilla Kubernetes 1.22 clusters. For more information, see Upgrade Velero and Datamover.
-
(Optional)Velero AWS Plugin Image: Enter the location where you have the Velero plugin image for AWS saved in your Docker registry. If you leave this field blank, then the Velero plugin image for AWS will be pulled from a public image registry on the internet. You can download the Cohesity Velero AWS Plugin Image from the Cohesity Downloads page.
-
(Optional)Init Container Image: Enter the location where you have the Init Container image saved in your Docker registry. If you leave this field blank, then Cohesity will use the Datamover image as the Init Container image.
-
Click Save. The credentials will be saved.
-
Click Refresh to complete the registration process. This updates the changes made to all Azure Kubernetes clusters automatically. It is not necessary to refresh each cluster individually.
Post-Registration Task
Once you register the Kubernetes source, perform the following actions:
-
Run the following command to view the ports associated with each node of the Kubernetes cluster.
kubectl get services -n cohesity-<cluster-id>
Ensure the ports associated with the nodes are open to enable communication between the Kubernetes cluster and the Cohesity cluster.
-
Verify all of the pods in the Kubernetes cluster are in running state by running the following command:
kubectl get pods -n cohesity-<cluster-id>
The namespaces are displayed on the Sources page of the Cohesity Dashboard only after all the pods are either in the running state or error state.
Refresh the Kubernetes source if there is an error on the source page. For more information, see Refresh the Kubernetes Source.
-

