Configure SSO with Google
5 May 2026
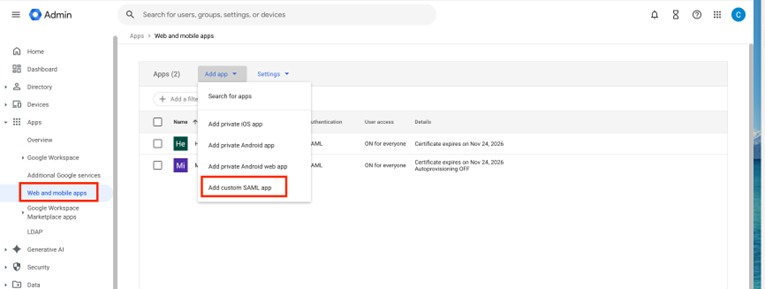
- Log in to Google Admin console.
- Navigate to Apps > Web and mobile apps.
-
Click Add app and select Add custom SAML app.
- Enter an application name and description.
-
On the Google Identity Provider detail page, the following information will be used for Helios SSO Configuration:
The SSO URL will be the Single Sign-On URL for Helios to configure SSO The Entity ID will be the Provider Issuer ID for Helios to configure SSO Download the Certificate
- Login to Helios.
- Navigate to Cloud Protection Services > Settings > Access Management > Single Sign-On.
- Click Configure SSO.
-
Select SAML and fill out the following details:
Field Value SSO Domain Your Google domain SSO Provider Type Google Single Sign-On URL Paste the SSO URL from the Google Identity Provider detail page Provider Issuer ID Paste the Entity ID from the Google Identity Provider detail page X.509 Certificate Upload the Certificate that you download from the Google Identity Provider detail page 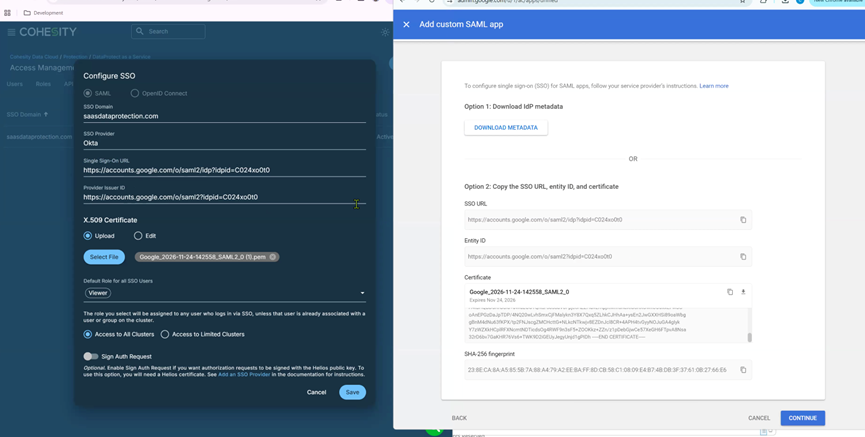
- Set the default role for all SSO users.
- Click Save.
- Go back to the Google Identity Provider detail page and click Continue.
-
On the Service provider details page, configure the following:
Field Value ACS URL Enter https://helios.cohesity.com/v2/mcm/idp/authenticate. Entity ID Paste the Entity ID from the Google Identity Provider detail page. - Click CONTINUE.
-
On the Attribute mapping page, click ADD Mapping and fill out the fields:
Field Value Google Directory attributes Select Primary email App attributes Enter email - Click FINISH.
- On the Web and mobile apps page, click on the SAML app you just created.
- Under User access, if it shows OFF for everyone, click on it and change it to ON for everyone.
- Now you can Sign in Helios with using your Google email.
For detailed instructions on creating a custom SAML app, see Google documentation:
https://knowledge.workspace.google.com/admin/apps/set-up-your-own-custom-saml-app
